
Section 1 – General Tasks
1.1 - Initial Settings/Credentials
Section 2 - Account Servicing Tasks
2.1.3 - Receiving at non-DEX customer
2.3 - Service Account - No Sale
2.4 - Voiding Invoices and Correcting Errors
Section 3 - Purchase Orders
Section 4 - Inventory and Reporting
4.1 - Route to Route Transfers
Section 5 - Day End Tasks
Appendix 1 - New Data Features
A.1.1 Keyboard changes
A.1.2 Invoicing Items
A.1.3 Proof of Delivery
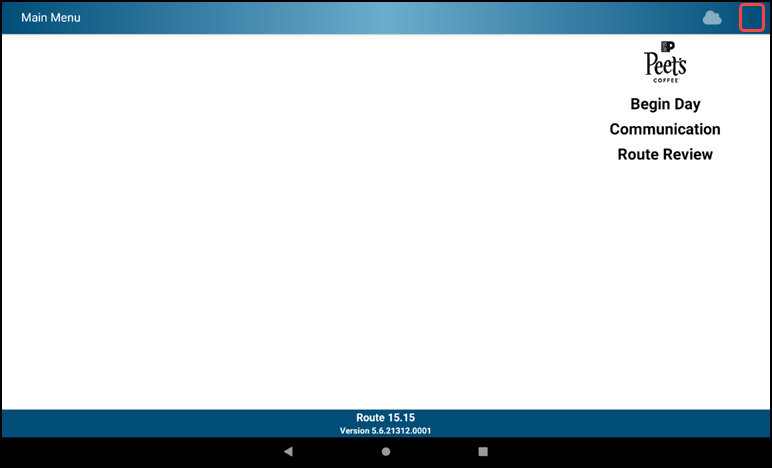
OmniTech Sales Application
Access the OTS application by tapping the OTS icon from the Tablet Home Screen:

Section1 - General Tasks
1.1 - Initial Settings/Credentials
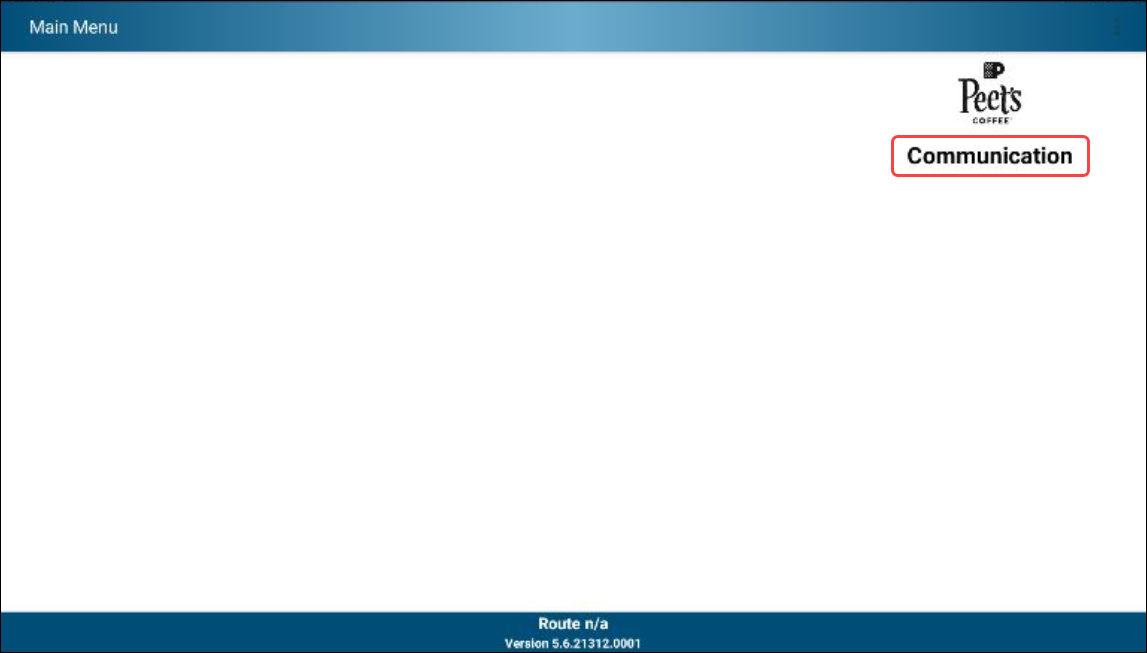
Before daily communications can take place, the initial settings and credentials must be established for the handheld. The required parameters may be entered by selecting Communication from the initial start-up screen
- Tap the blank section in the upper section of the screen to bring up the Settings entry window
- Tap the Connection Type Omnitech Web Server
- Tap the Connection Type Single Sign On from the drop down menu
- Tap OK
The required entries are as follows:
1. Connection - set this to Single Sign On
2. URL - this is always the same - https://cpg-dsd.peets.net:1443
3. Location - This is your assigned Route Number
4. Division - This is also your assigned Route Number
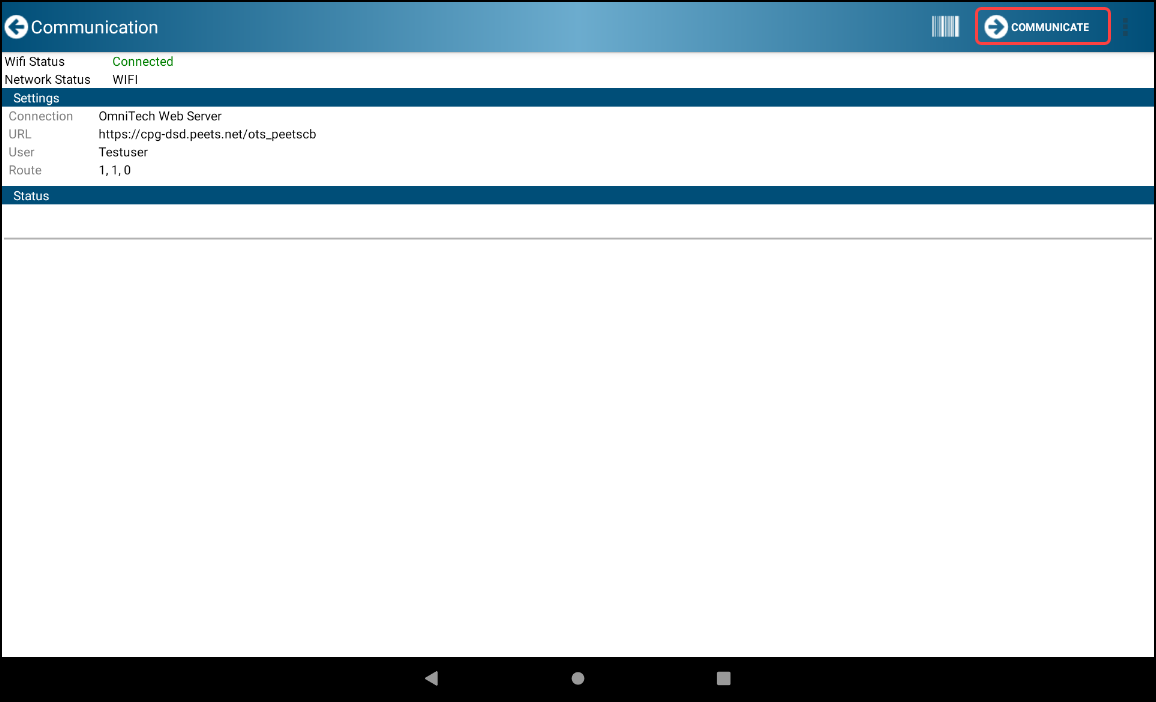
Tap OK to establish the required entries for further communication
Tap the Communicate button
Tap the Okta SAML link
Tap Enter your Peet's Account username and Password, then tap Sign In
Enter your Multifactor Authentication Code and Tap Verify
In this example we used the Voice Call Authentication
OTS Communication will now begin automatically after signing into Okta
- Tap Finalize-Arrow COMMUNICATION to return to the Main Menu
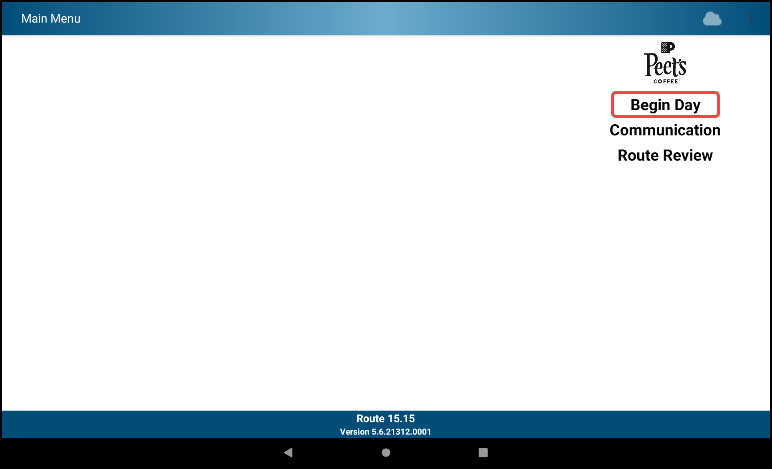
1.2 - Begin Day
- Tap on Communication
- Tap the Finalize-Arrow COMMUNICATE icon to Communicate
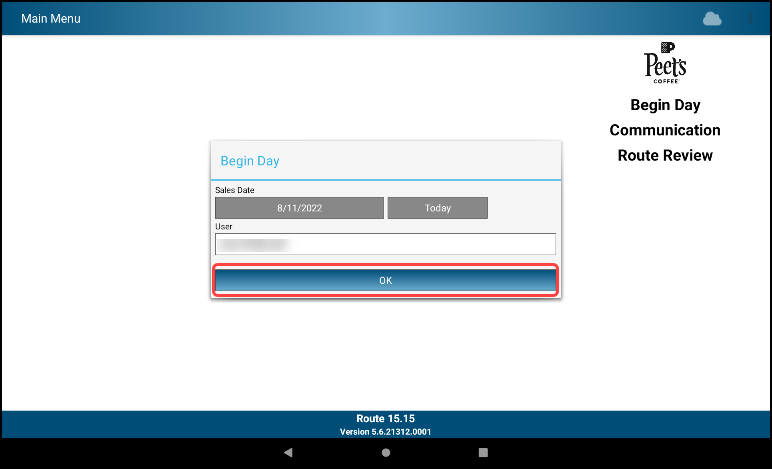
- Tap on Begin Day
- Select your name from User list, using the onscreen display to filter options
- Tap on your name to select it
- Tap OK to proceed
1.2 Finish Begin Day
- Tap Finish Begin Day
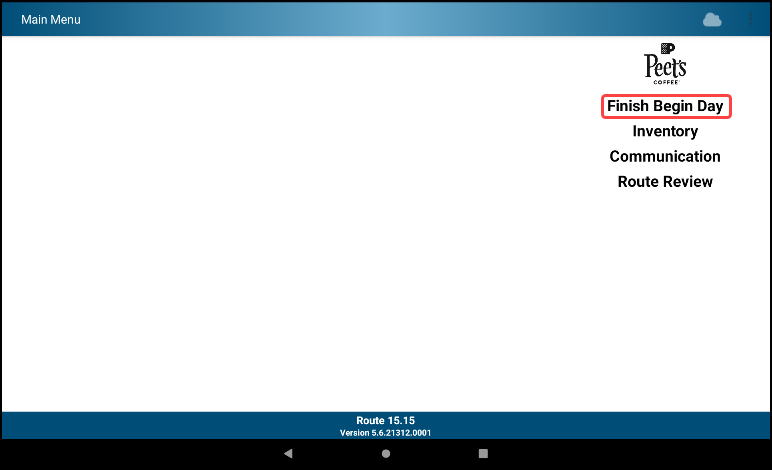
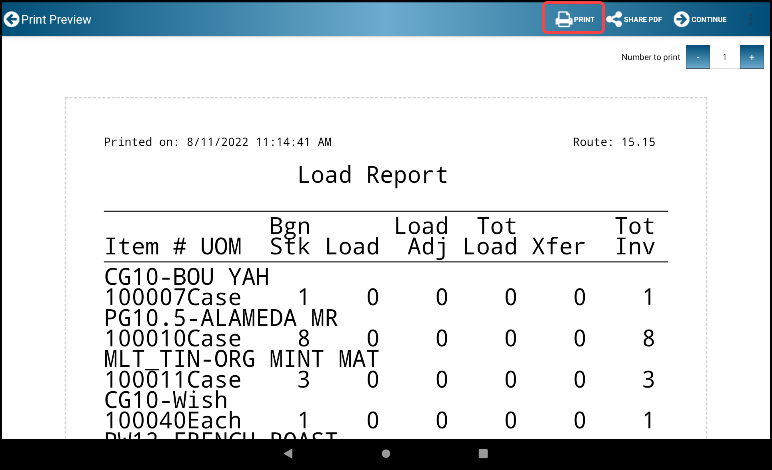
- A Load Report is created but may take a few minutes to complete
- Tap the Print icon to print
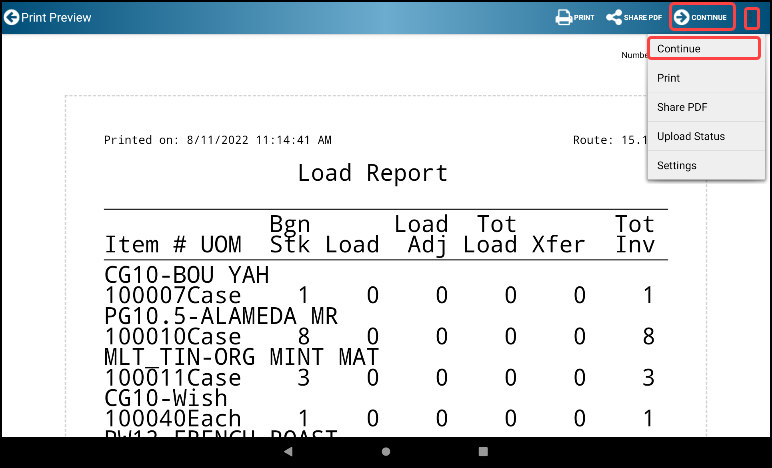
- Tap the Finalize-Arrow CONTINUE icon or the Ellipsis/Menu Dots followed by Continue
Section 2 - Account Servicing Tasks
2.1 Service Account
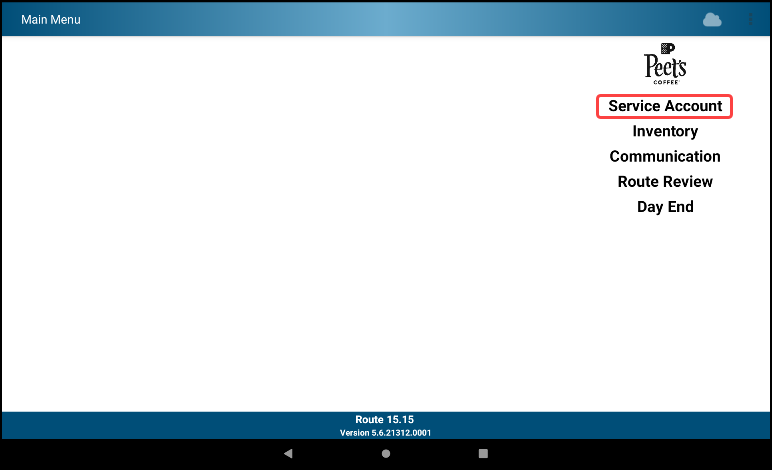
- Tap Service Account
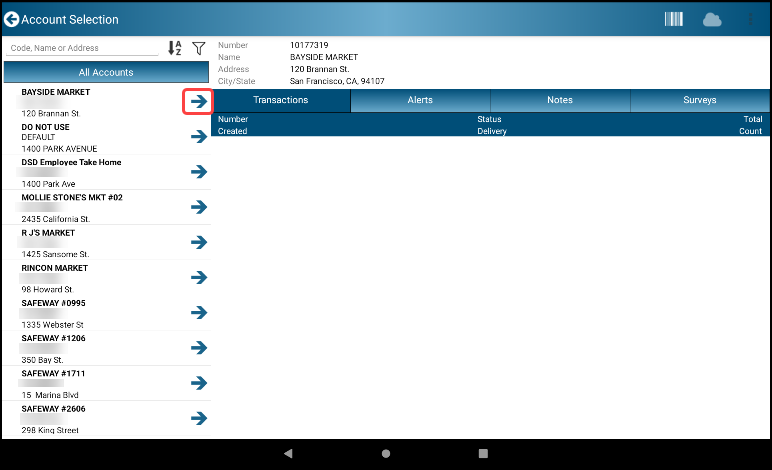
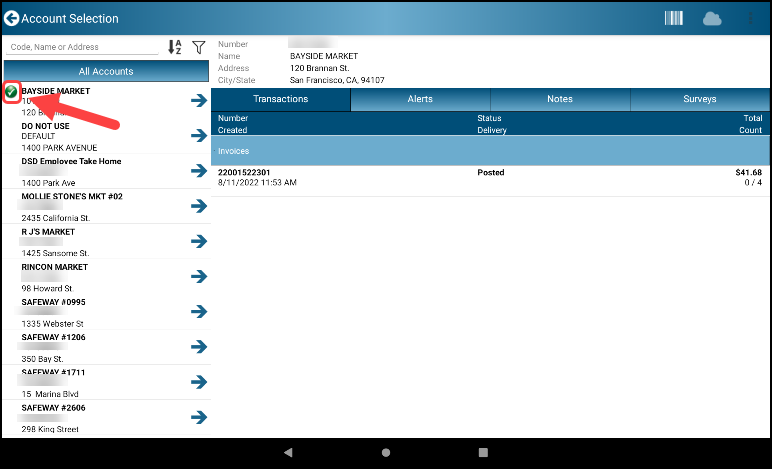
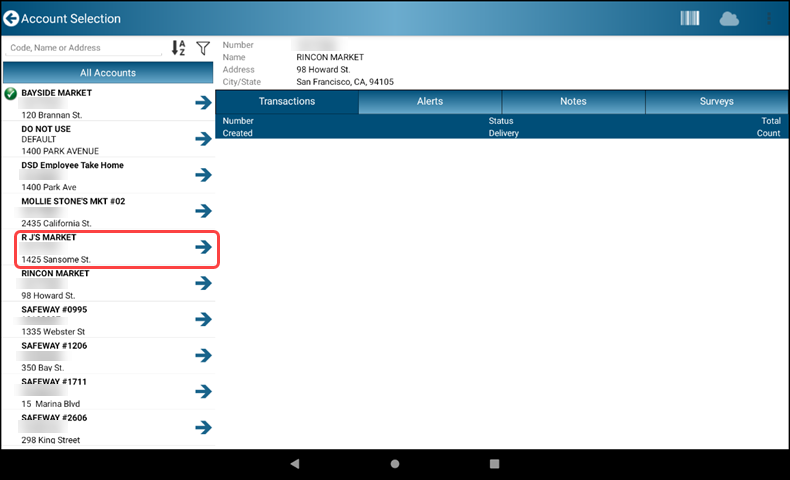
- A list of All Accounts (stores) is displayed
- The list is displayed in alphabetical order by default
- Choose an account by tapping the Finalize-Arrow icon next to the customer
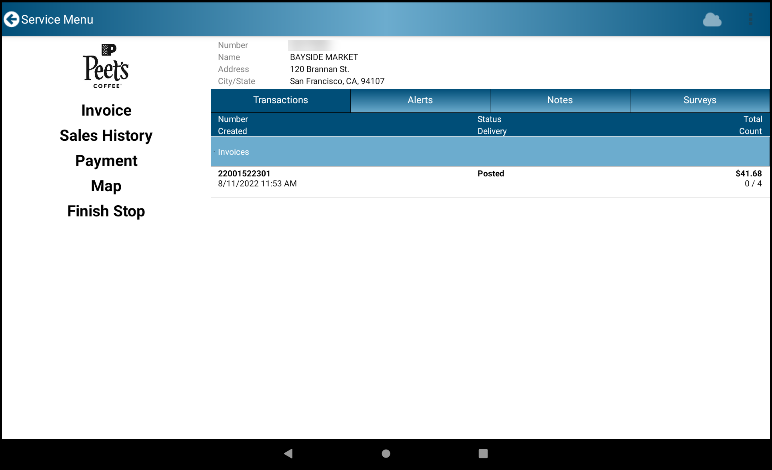
- Select Invoice from the Menu

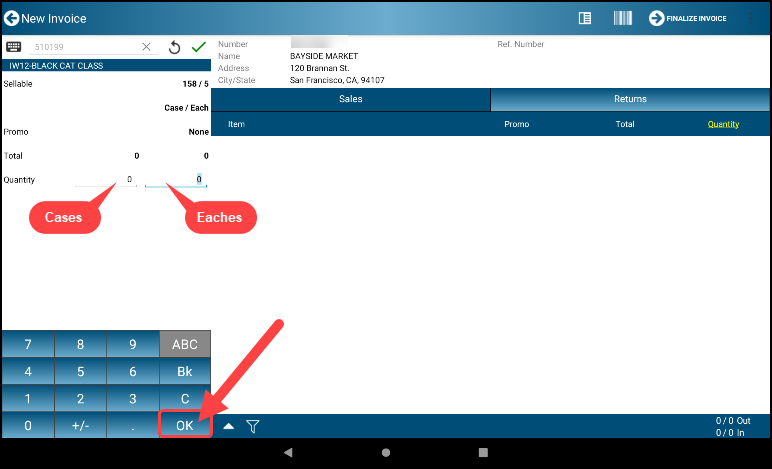
- Select product by scanning or tapping on the product name

- Choose the desired quantity by case/each; tap OK or the green checkmark
- Repeat for each additional product
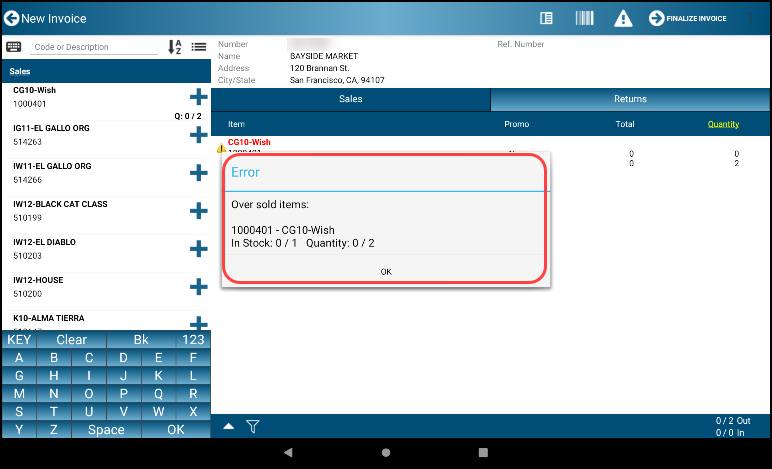
- If you enter a quantity that exceeds available inventory an error message appears. Click OK and return to product/quantity selection and adjust
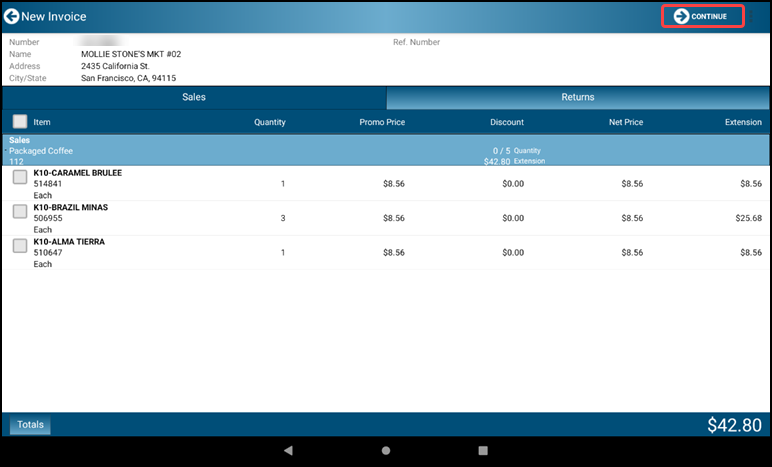
- When finished, tap the Finalize-Arrow FINALIZE INVOICE icon at the top of the screen to view the summary

- Tap the Finalize-Arrow FINALIZE INVOICE icon again to finalize the invoice
- You may Tap the Ellipsis/Menu Dots and then select Pick List to display the pick list
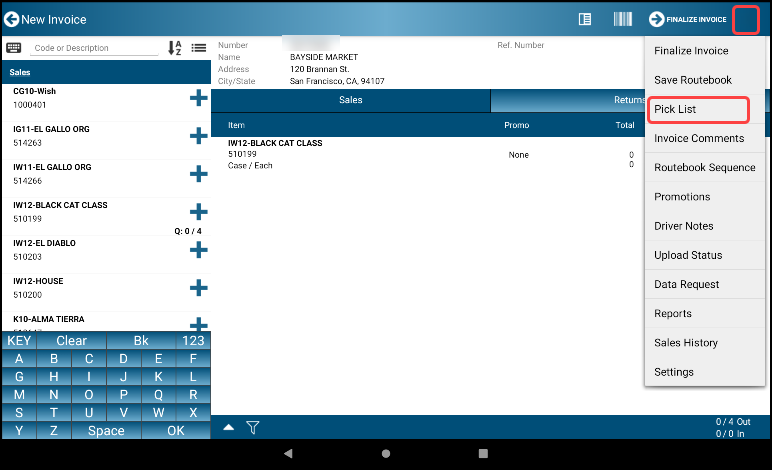
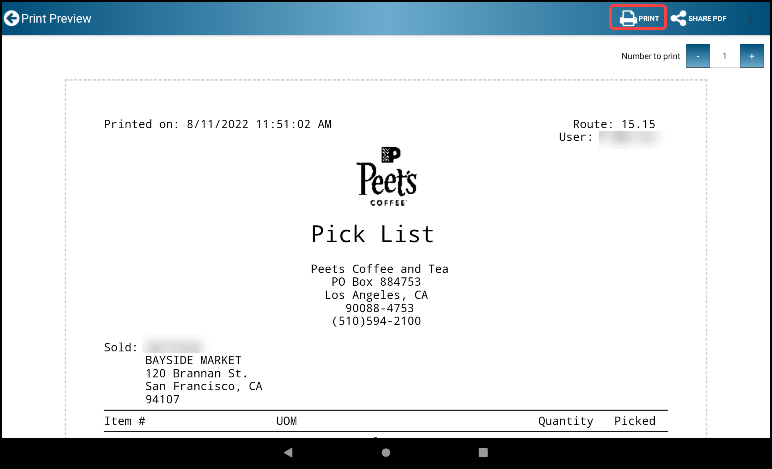
- Tap the Printer icon to print the Pick List prior to picking the items
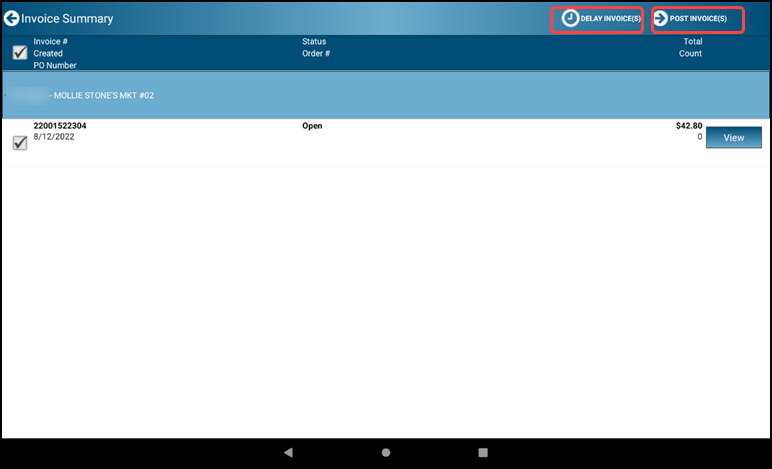
- When complete you can finalize the invoice by tapping the Finalize-Arrow POST INVOICE(S) icon
- NOTE: If you are at a DEX location the DEX screen will be presented, otherwise the next standard screen is presented

2.1.1 DEXing
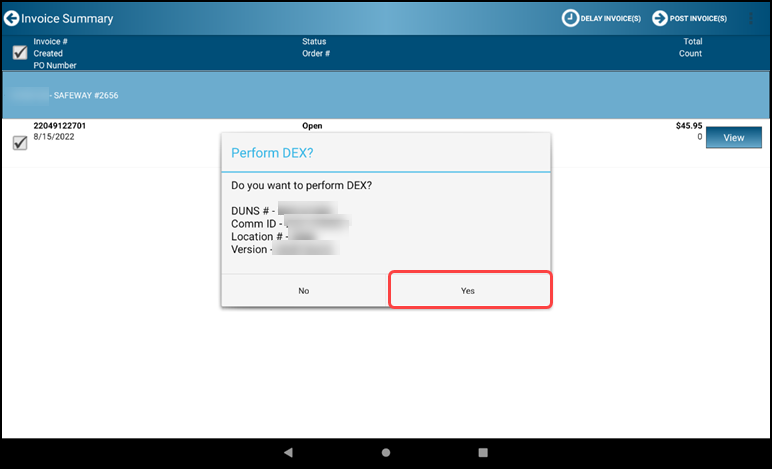
- If you are ready to proceed, tap the YES button to start DEXing
- WARNING: If not ready or unable to DEX, tap NO and the invoice can be finalized without DEXing
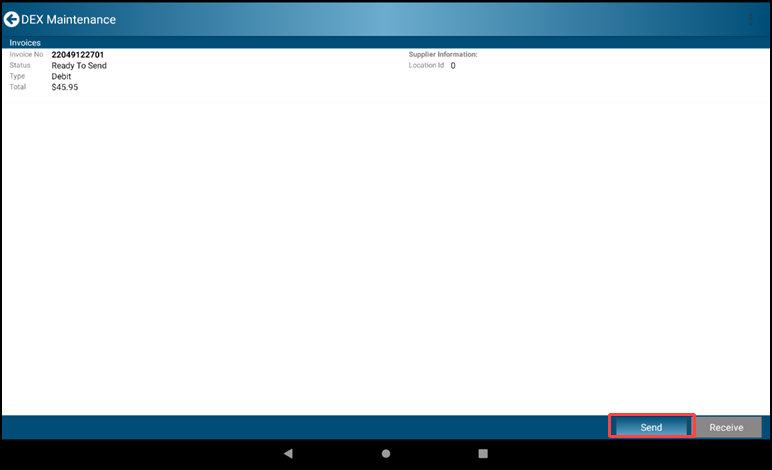
- The DEX Maintenance screen is displayed. You may select the Ellipsis/Menu Dots icon followed by Settings to review the DEX settings
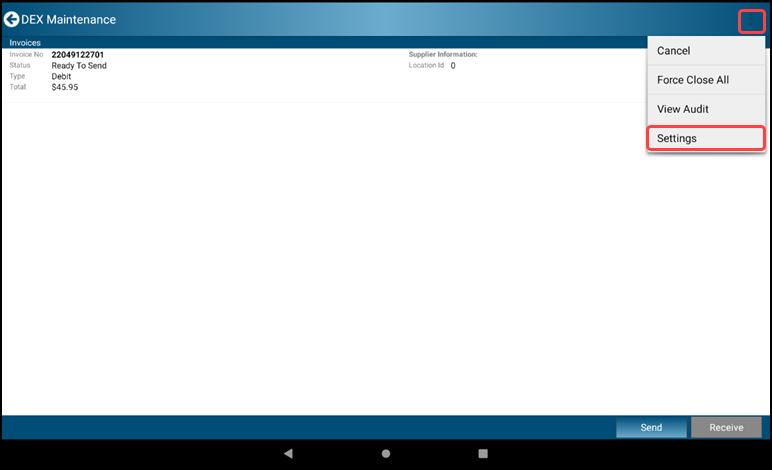
- Tap the Back-Arrow Settings icon to return to the DEX Maintenance screen

- Tap the Send button to transmit the invoice DEX data to the store

- With the send completed Tap the Receive button to receive invoice DEX confirmation data from the store
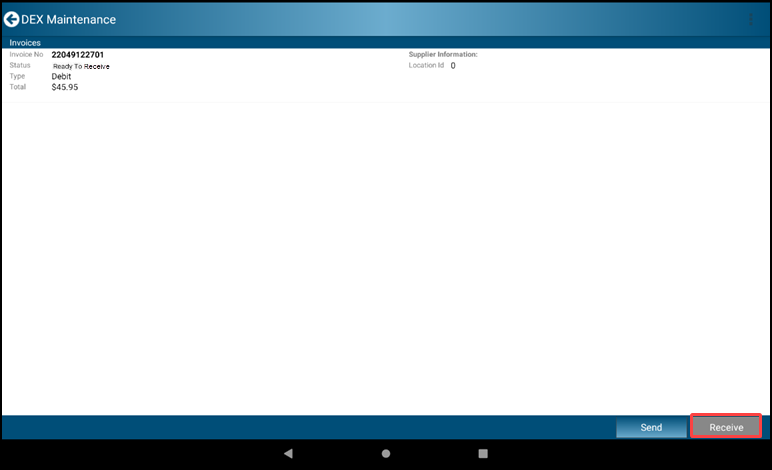
- When completed you will see the green checkmark in the right caption that indicates you have completed the invoice for the customer

2.1.2 Receiver Scanning
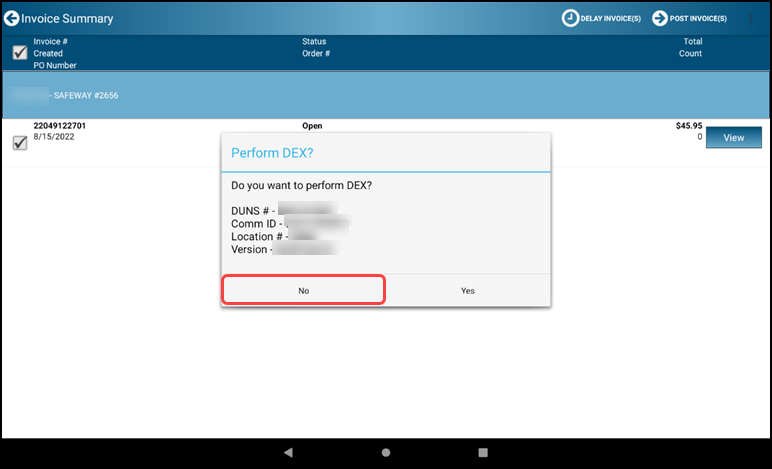
- Tap the Finalize-Arrow POST INVOICE(S) icon

- When prompted to Perform DEX, select No
- Print or share a copy of your invoice
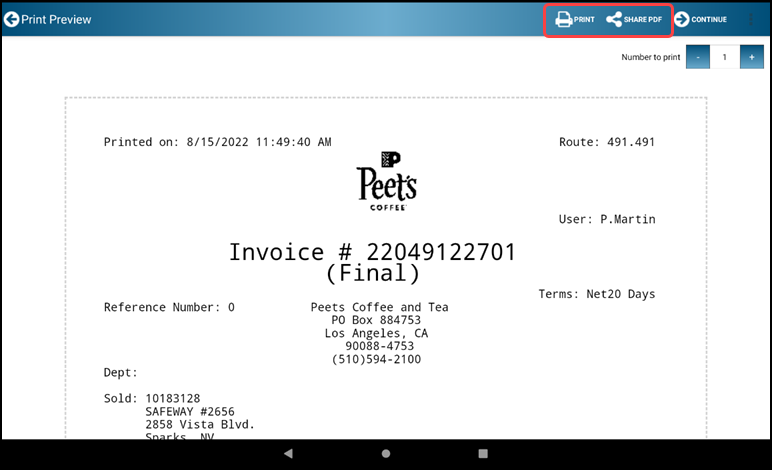
- The invoice is displayed for printing or sharing. Select Finalize-Arrow CONTINUE
- You will see the green checkmark in All Accounts that indicates you have completed the invoice for the customer
2.1.3 Receiving at non-DEX Customer
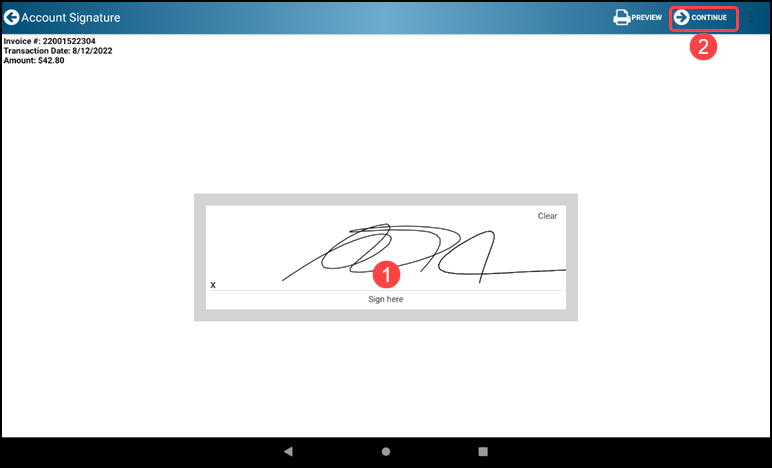
- Select Finalize-Arrow FINALIZE INVOICE

- Sign in the signature box and press Finalize-Arrow CONTINUE
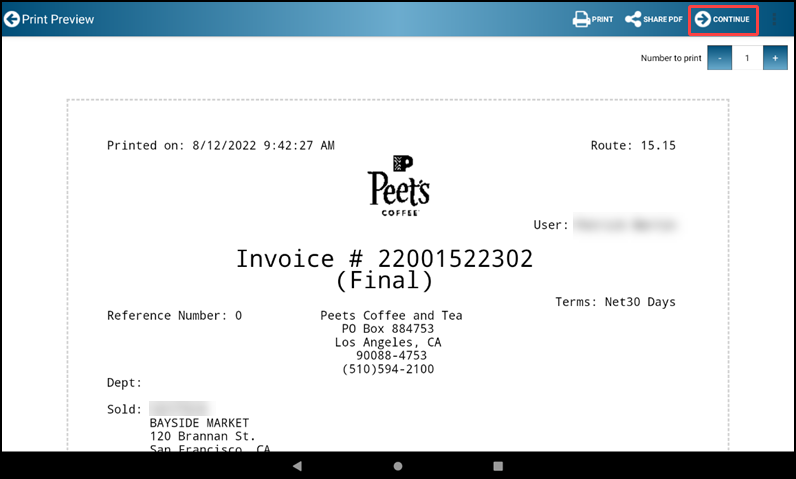
- The invoice is displayed for printing or sharing, print copies of your invoice.
- Tap the Continue button to complete the invoice, it will bring you back to the Service Account screen
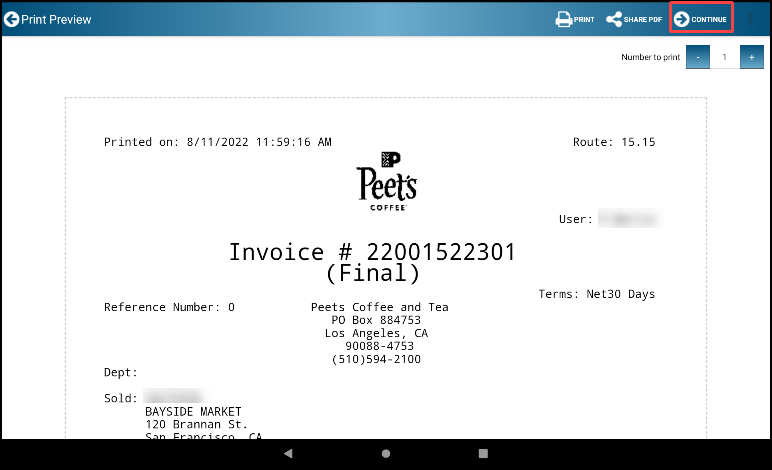
- You will see the green checkmark in All Accounts that indicates you have completed the invoice for the customer
2.2 Returns and Buybacks
Follow these steps to account for products that are out of code, damaged, or bought back with servicing an account
- Tap Service Account
- A list of All Accounts is displayed
- Choose an account by tapping the Finalize-Arrow icon next to the customer
- Select Invoice from the Menu
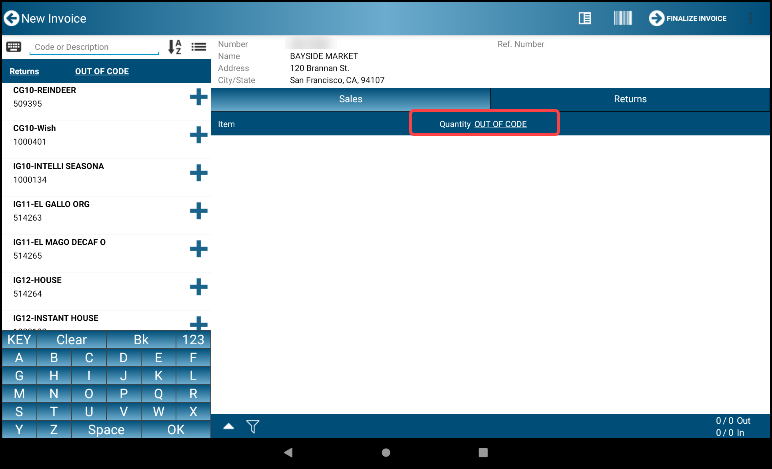
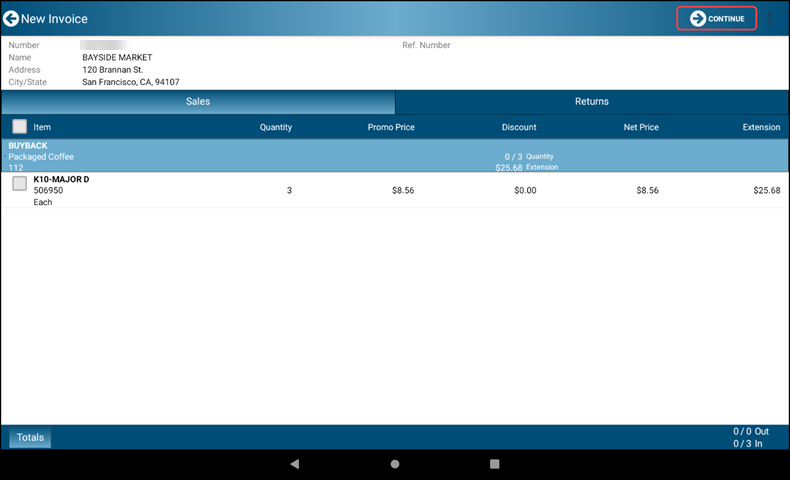
- On the screen, select Returns
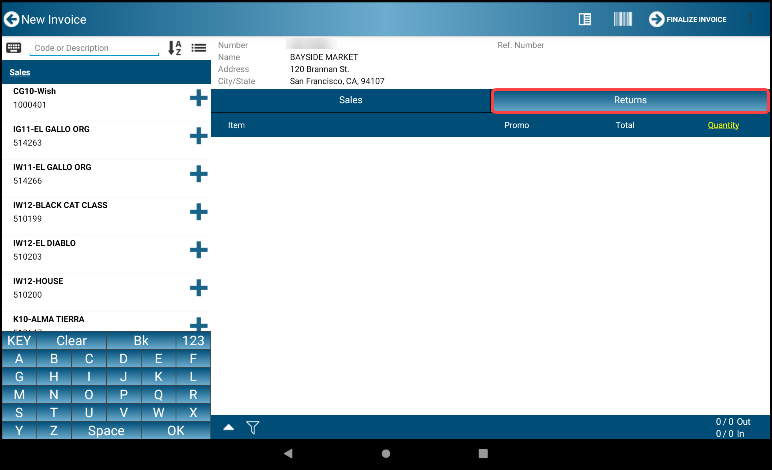
- Tap bar Quantity: OUT OF CODE
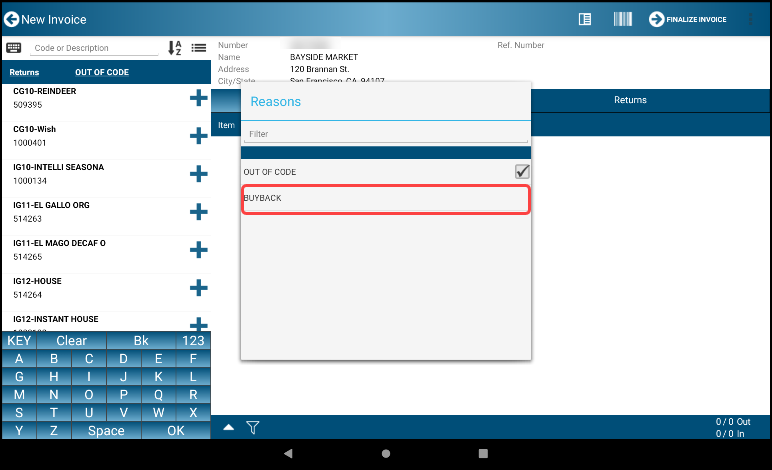
- A Pop Up Menu of Reasons is displayed - select the correct reason - BUYBACK
- Select the Product and Qty to be returned
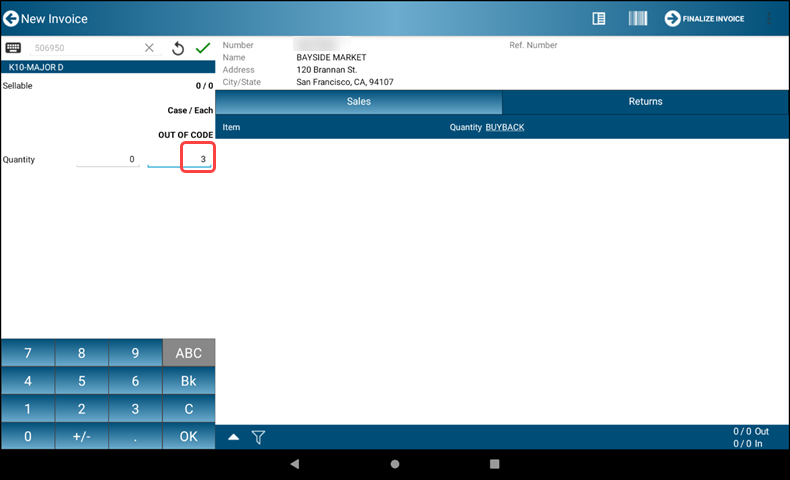
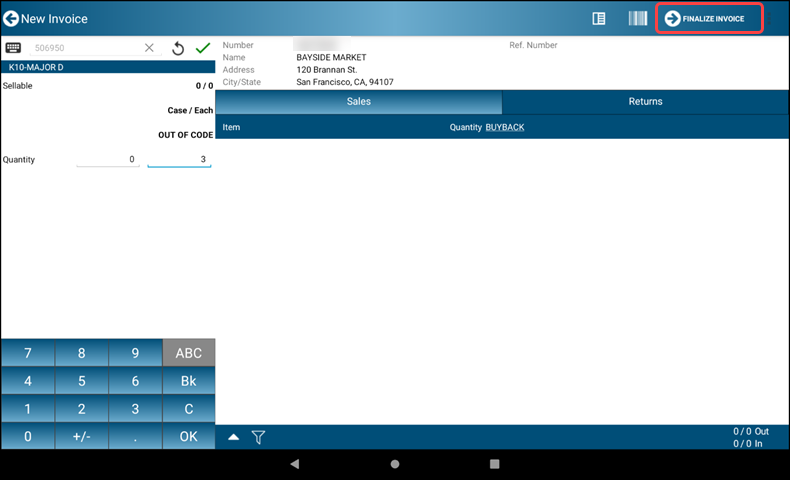
- Repeat the process for each return product, then Tap the Finalize-Arrow FINALIZE INVOICE icon to continue
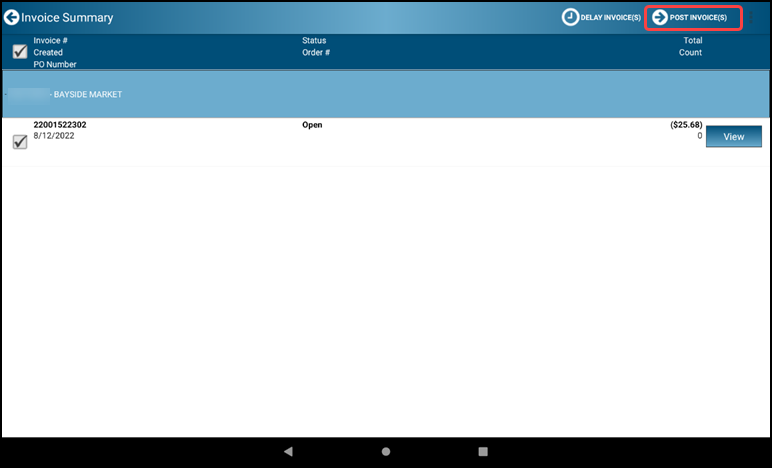
- After reviewing the summary, Tap the Finalize-Arrow CONTINUE icon to continue
- Tap the Finalize-Arrow POST INVOICE(S) icon to complete the return transaction
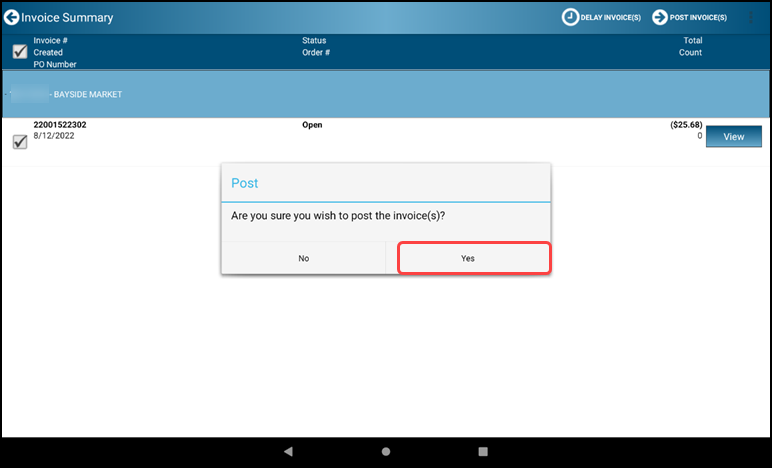
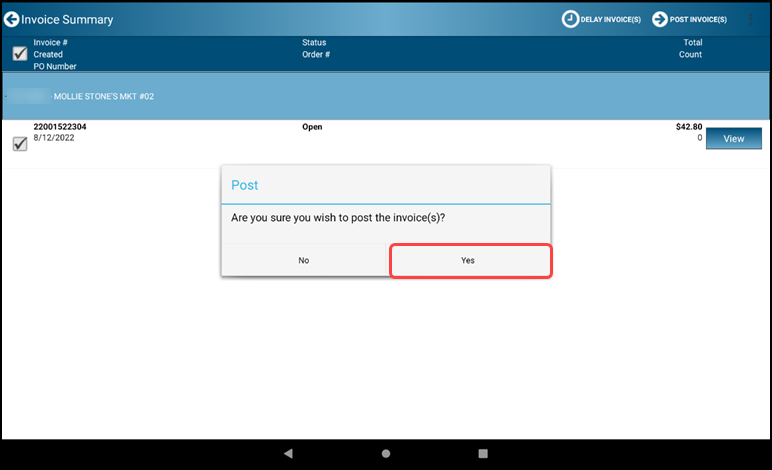
- Tap Yes to post the invoice
- Sign in the signature box and press Finalize-Arrow CONTINUE
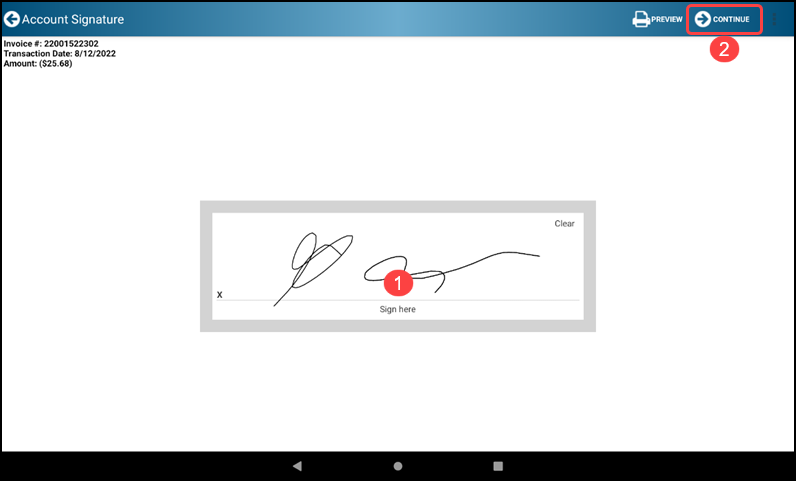
- The invoice is displayed for printing or sharing, print copies of your invoice.
- Tap the Continue button to complete the invoice, it will bring you back to the Service Account screen
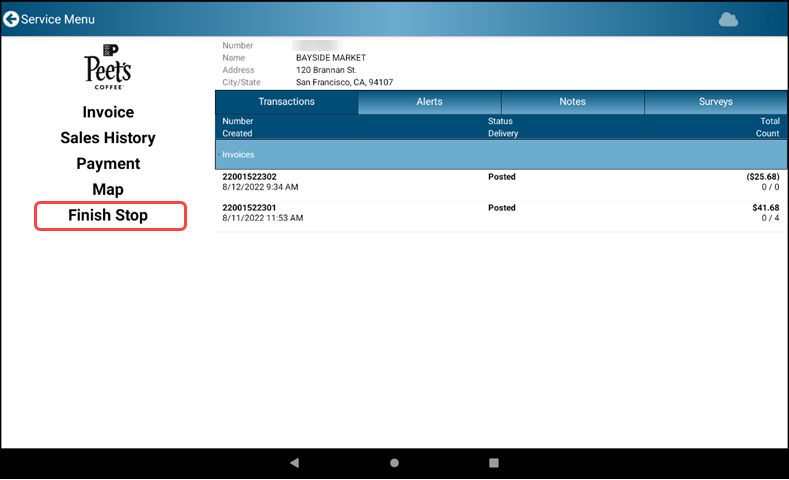
- With the account visit completed tap Finish Stop to return to the Main Menu
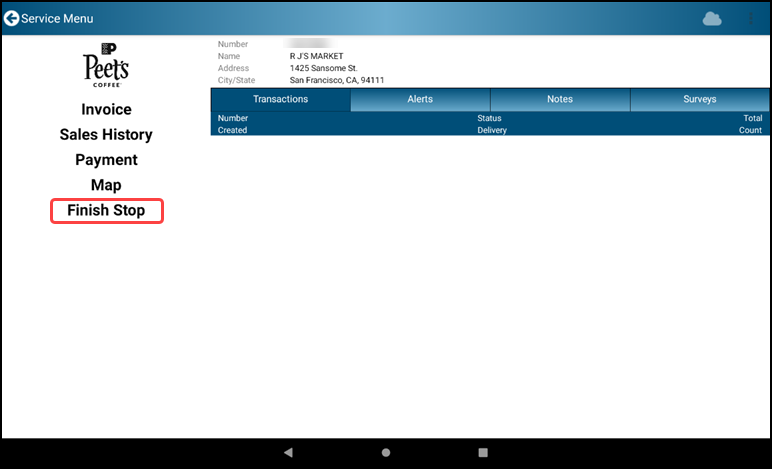
2.3 Service Account - No Sale
- While in the store, choose the customer from the list
- With the account visit completed, Tap Finish Stop
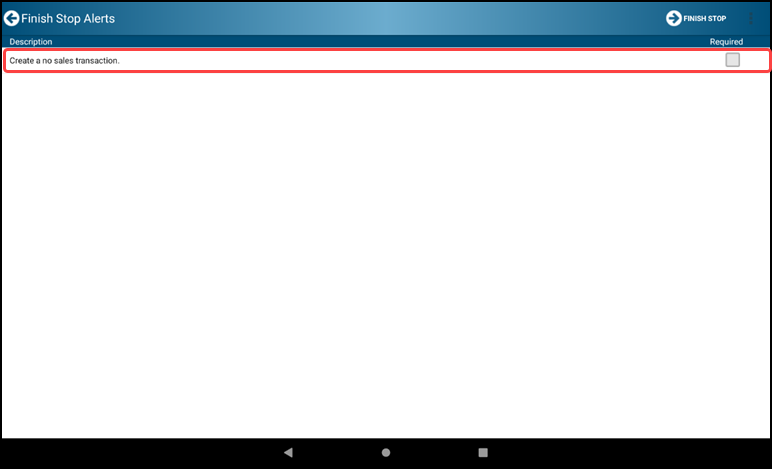
- The Finish Stop Alerts Menu appears. Select Create a no sales transaction
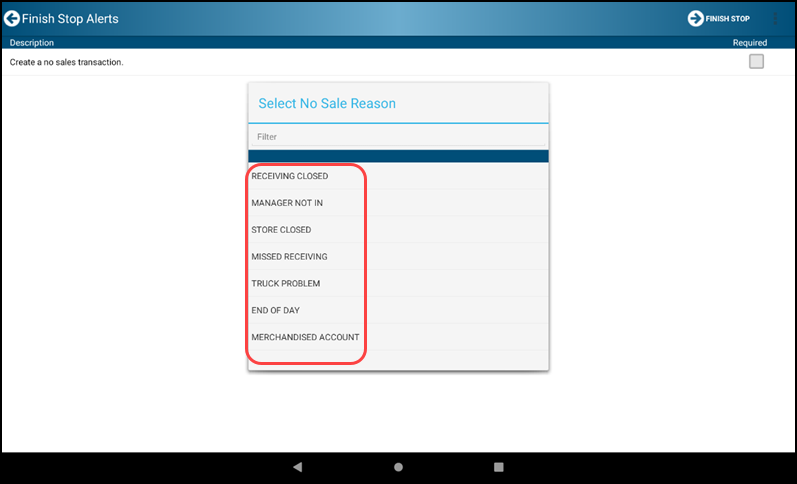
- Choose the reason for No Sale by tapping the correct selection. Tap the Finalize-Arrow FINISH STOP icon
- Sign the signature box and select the Finalize-Arrow CONTINUE icon to continue
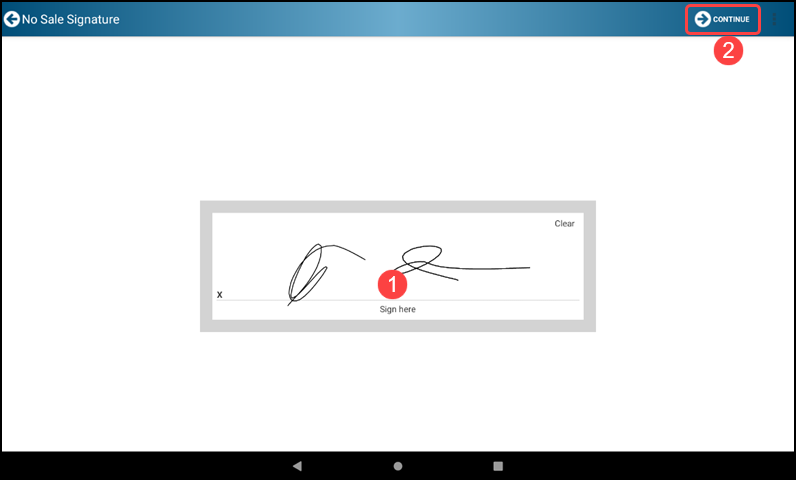
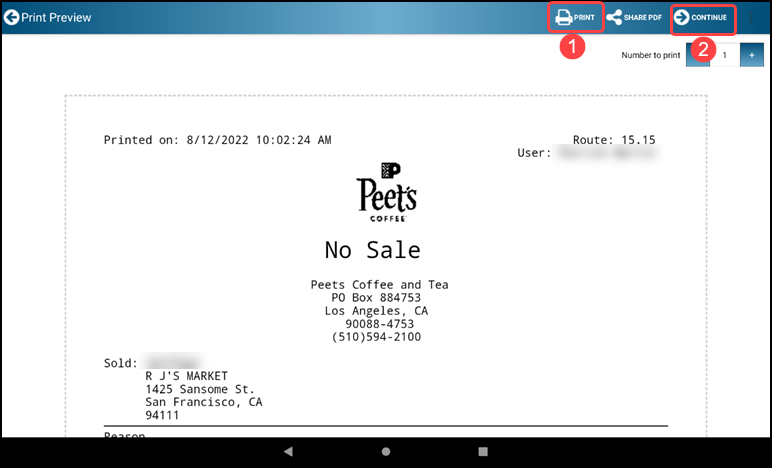
- The No Sale report is displayed with printing and sharing options. Tap the Finalize-Arrow CONTINUE icon to complete the transaction
2.4 Voiding Invoices and Correcting Errors
Follow these steps to cancel or fix errors on completed invoices (prior to communicating End of Day)
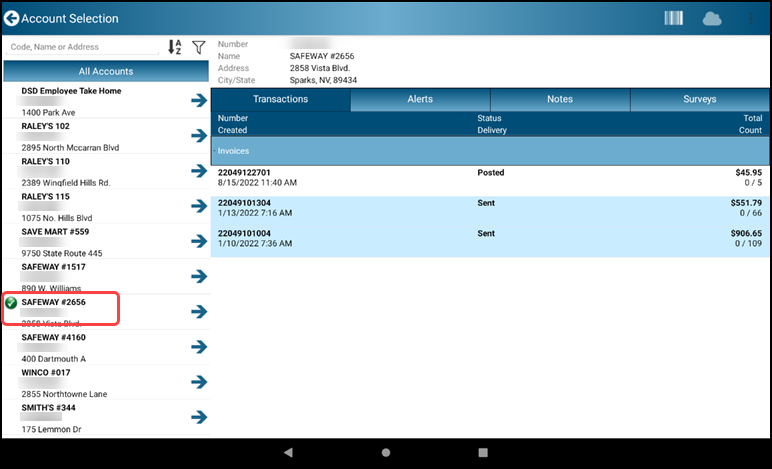
- Navigate to Service Account and locate the store with the invoicing error
- Tap the Finalize-Arrow icon next to the correct store to open the servicing Menu
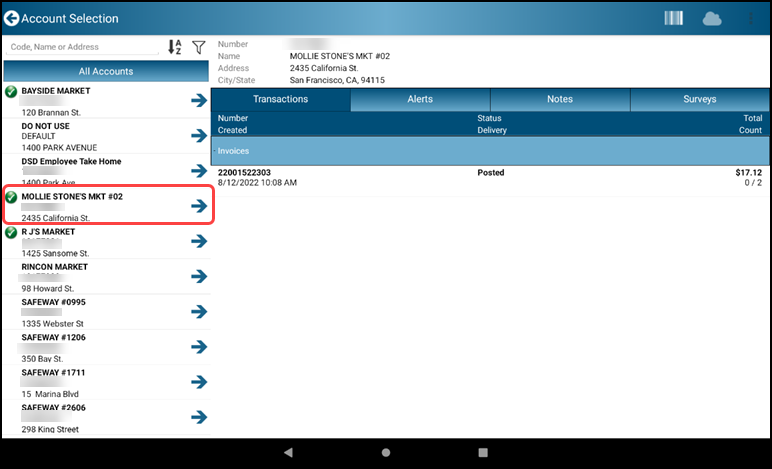
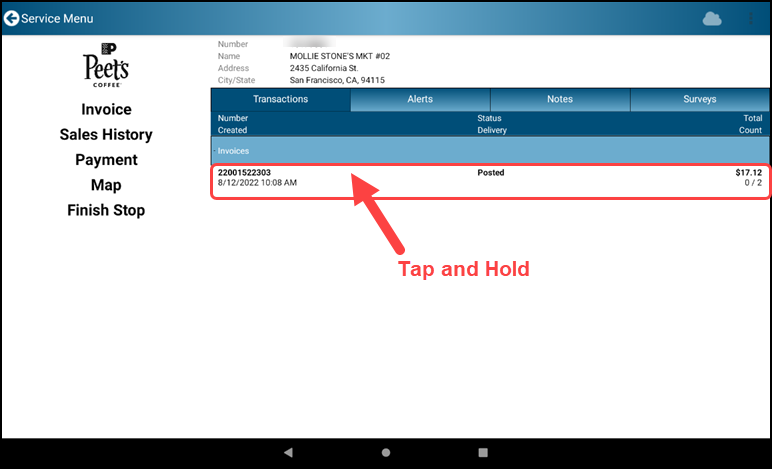
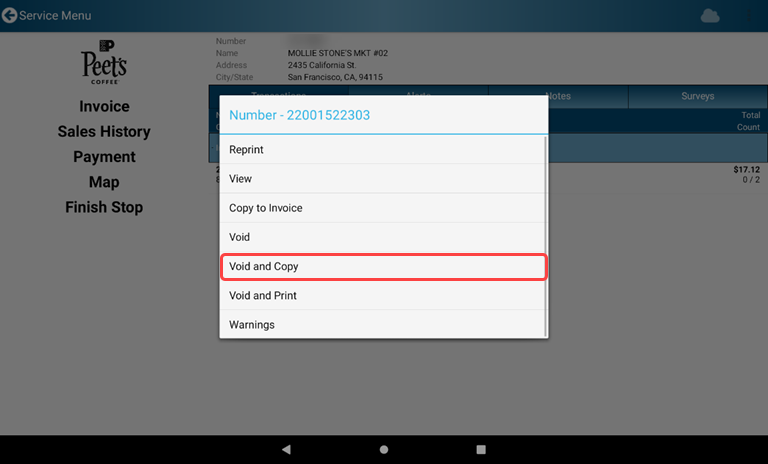
- Invoices for the selected account are displayed. Tap-and-hold on the invoice listing area for associated with the invoice containing the error and a hidden Menu will appear
- Select the appropriate option from the displayed Menu
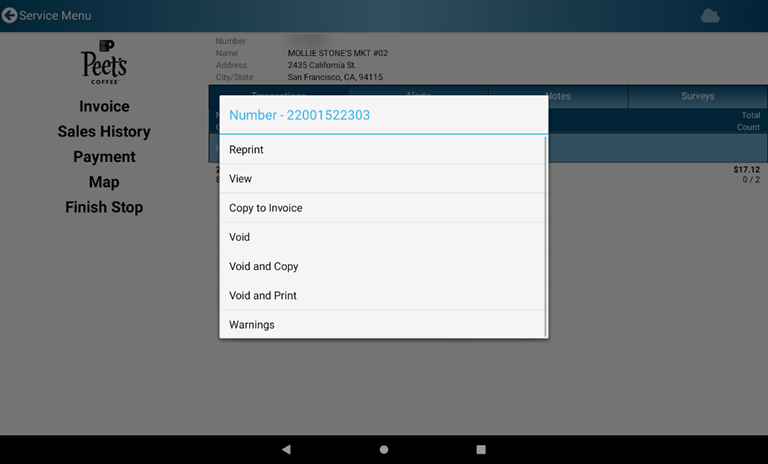
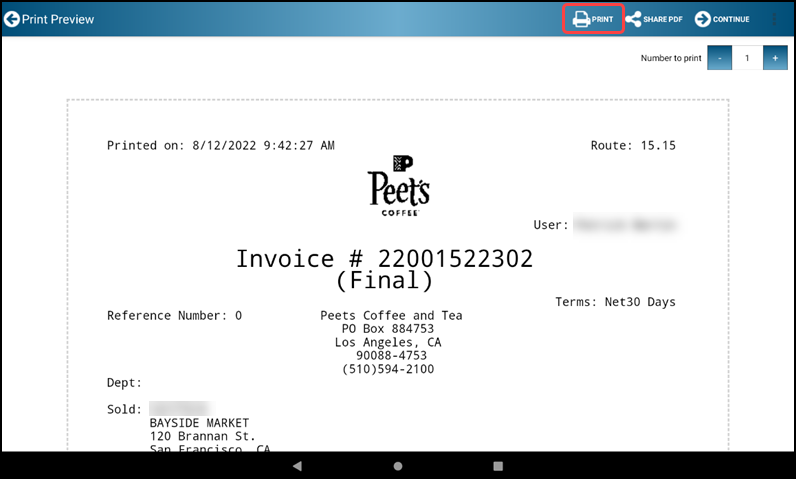
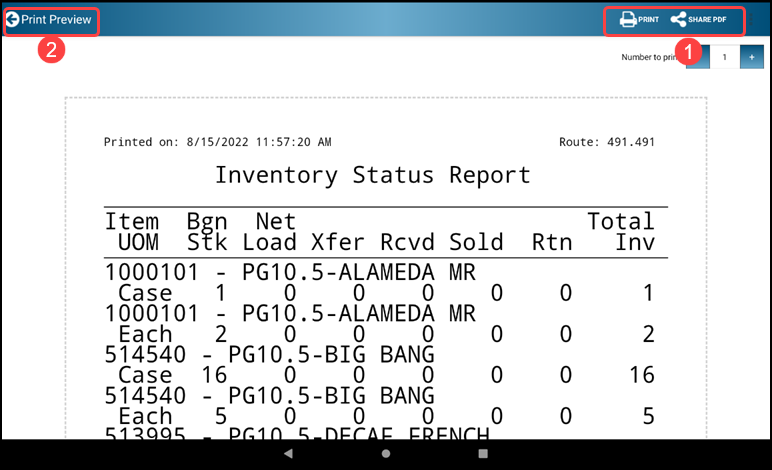
- Reprint - Reprints the Invoice on your printer

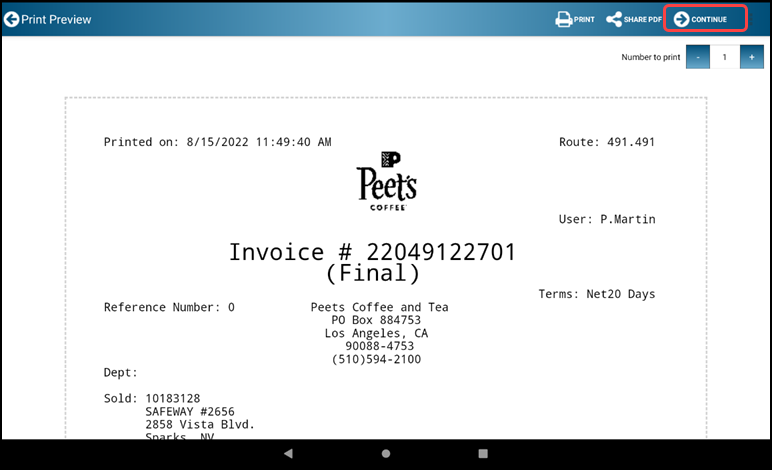
- The Invoice is displayed. You may select PRINT or SHARE PDF to forward the invoice for print or share.

- Select Back-Arrow Print Preview to return to selected Invoice

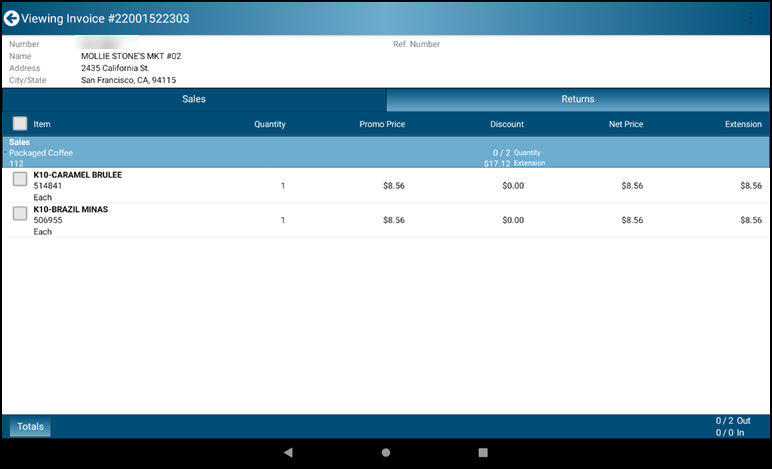
- View - Displays the Invoice on the screen

- Items associated with the Invoice are displayed for selection
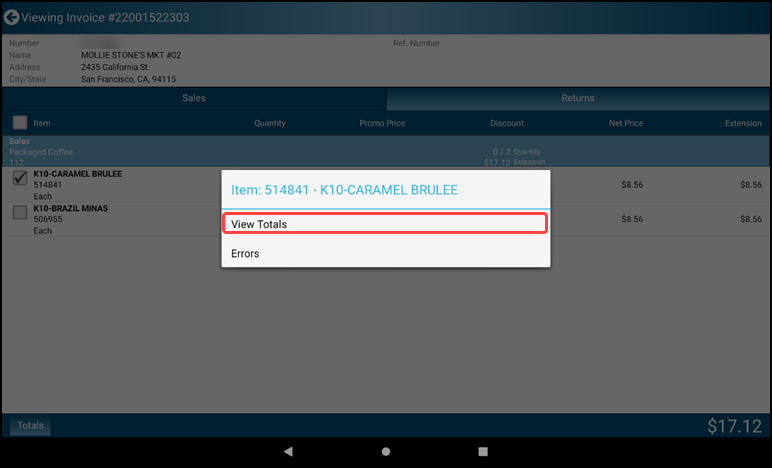
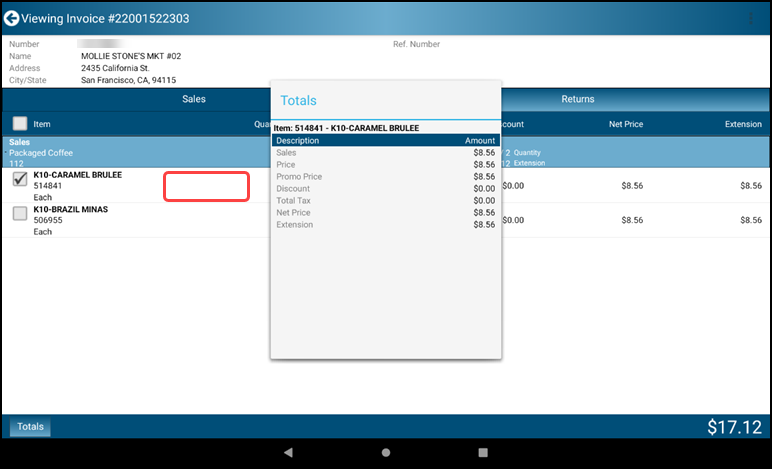
- Select a line item and tap then hold in the item list area to bring up the item window. Tap the View Totals text to display line item details for the invoice item.
- Tap outside the Totals window to release it and select the Back-Arrow Viewing Transaction icon to return to selected Invoice
- Copy to Invoice - Creates a copy of the Invoice with a new Invoice number that can be edited
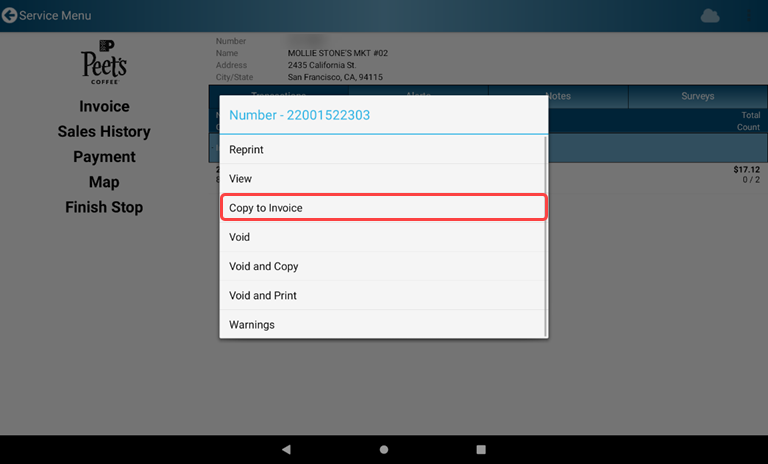
- A copy of the selected invoice is displayed for editing
- Select items for adjustment

- Adjust item quantities as needed and select the green arrow to add item to the Invoice

- When item editing is complete tap the Finalize-Arrow Finalize Invoice icon to review the new Invoice

- Review the invoice. Tap the Forward-Arrow Continue icon to accept the Invoice
- Tap the Forward-Arrow POST INVOICE(S) icon to post the invoice. The DELAY INVOICE(S) icon makes the Invoice available to post later
- Tap Yes to post the invoice
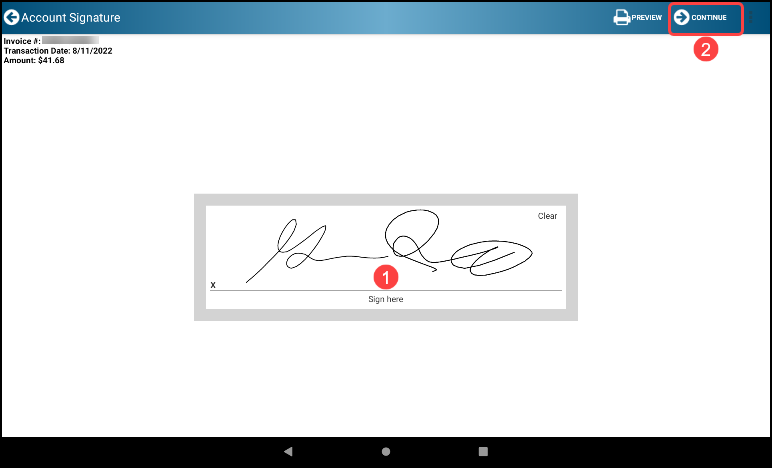
- Sign in the Sign here box and tap Continue
- The Invoice is displayed for printing or sharing. Tap the Forward-Arrow CONTINUE icon to return to selected Invoice

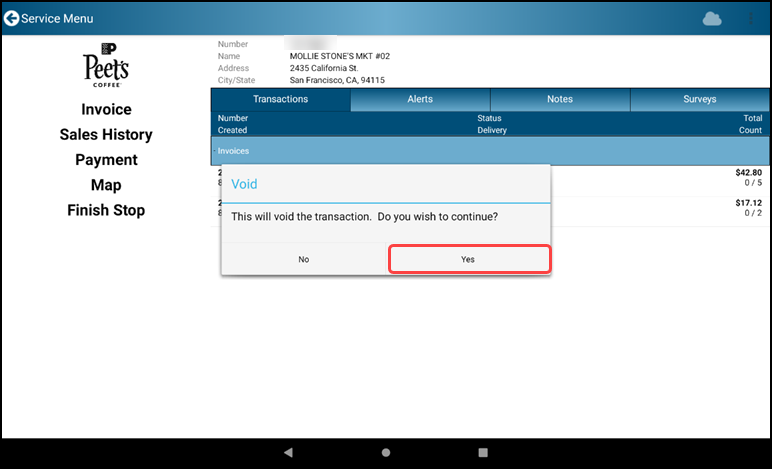
- Void - Cancels and deletes the Invoice

- A void confirmation window appears. Select Yes to void the invoice and continue
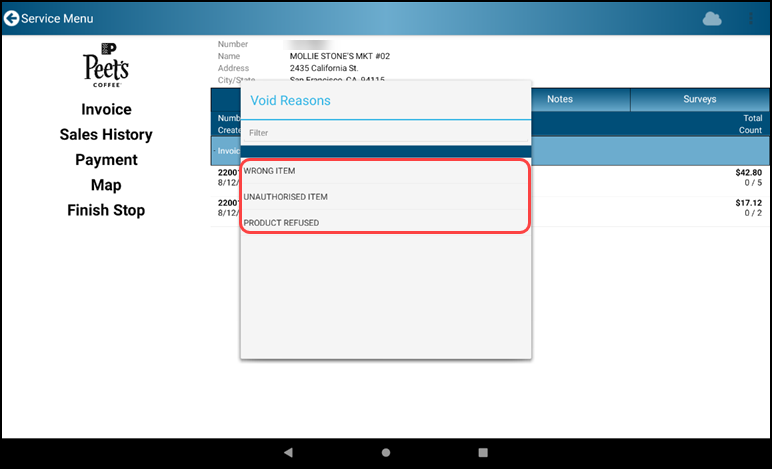
- Select the appropriate void reasoning
- Void and Copy - Creates a copy of the original invoice with a new Invoice number that can be edited while also canceling and deleting the original invoice
- A warning popup will appear to confirm whether or not you want to proceed
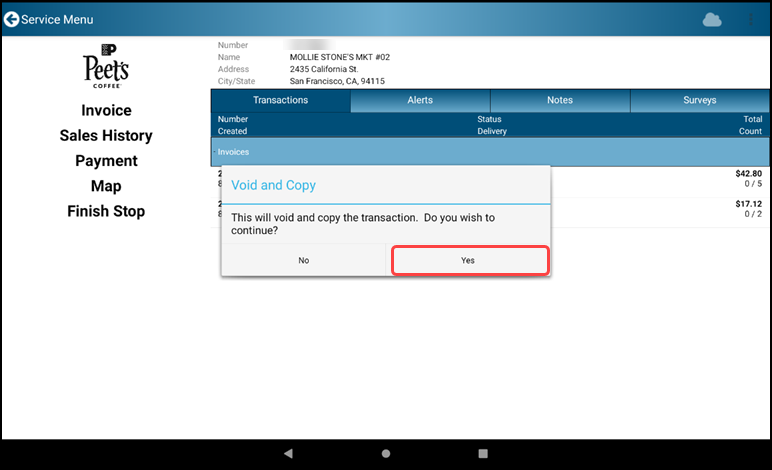
- Select the appropriate void reasoning
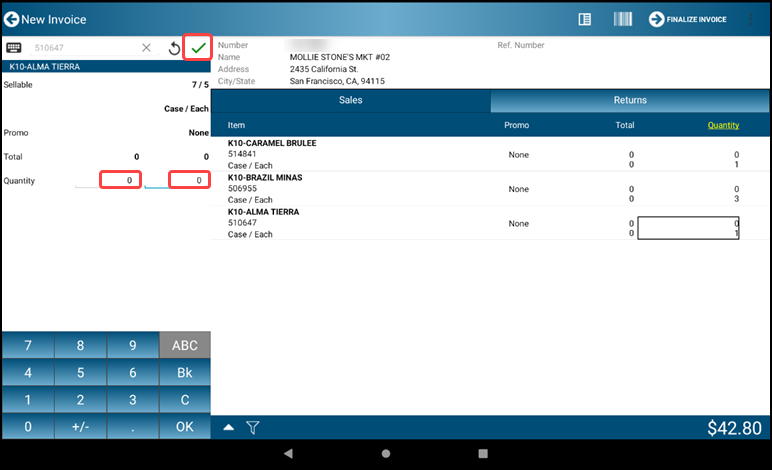
- A copy of the selected invoice is displayed for editing. Select items for adjustment
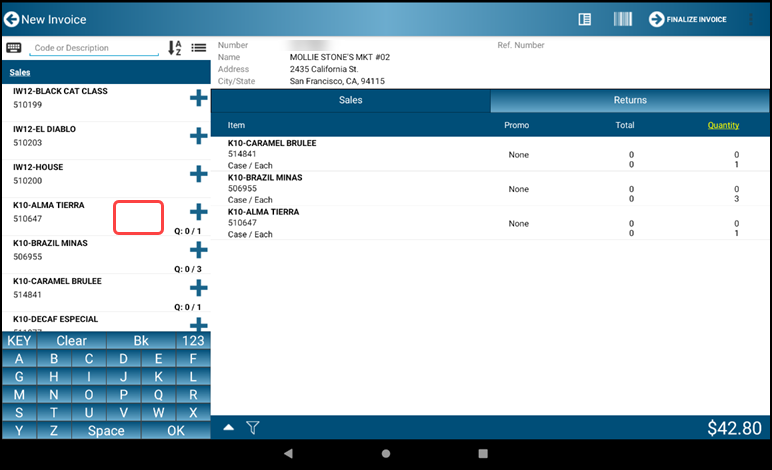
- Adjust item quantities as needed and select the green arrow to add item to the Invoice
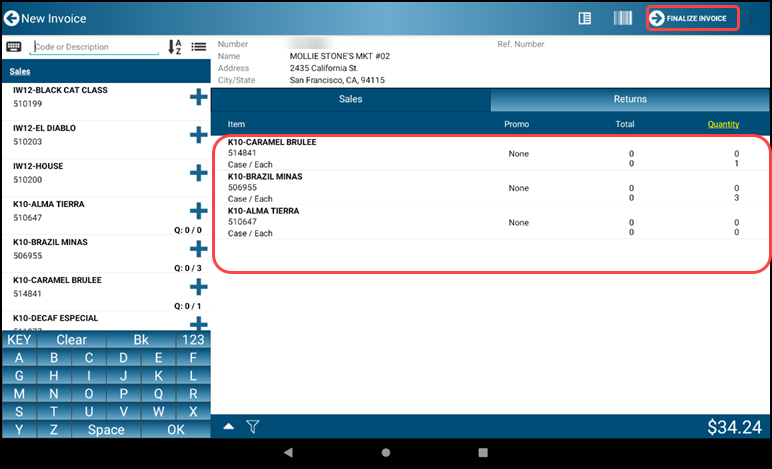
- When item editing is complete tap the Finalize-Arrow Finalize Invoice icon to add the new Invoice
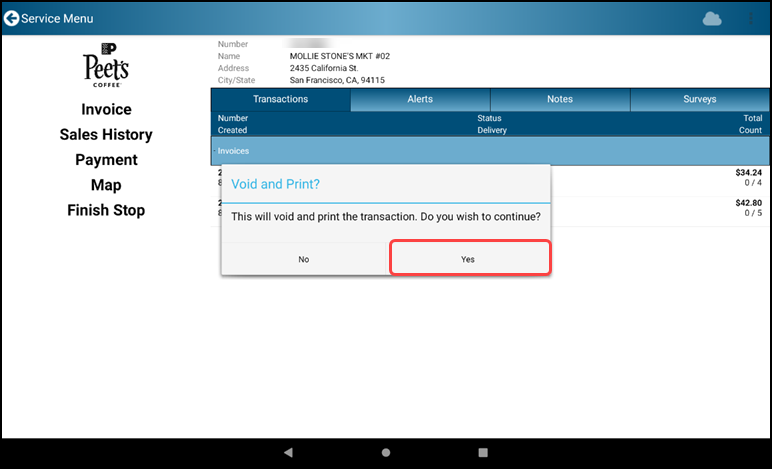
- Void and Print - Voids the invoice and displays a copy of the voided invoice for printing
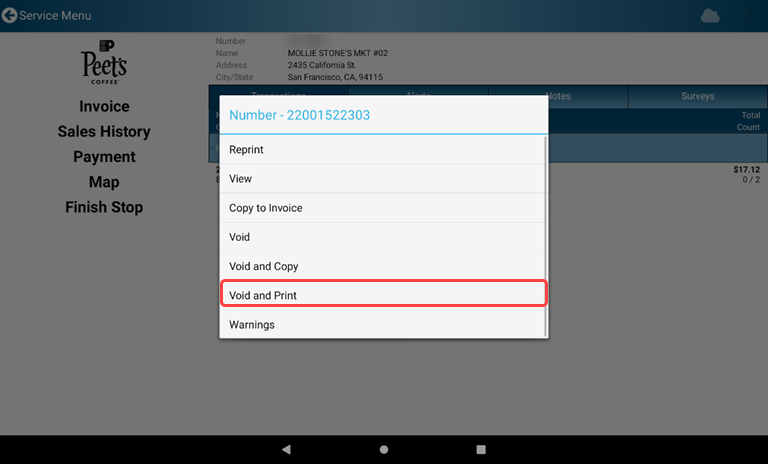
- Tap yes to continue to Void and Print
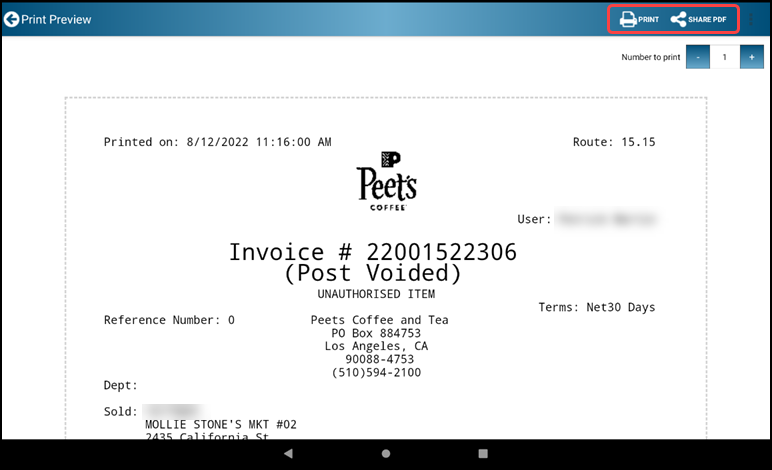
- Select the appropriate reason for Voiding this invoice

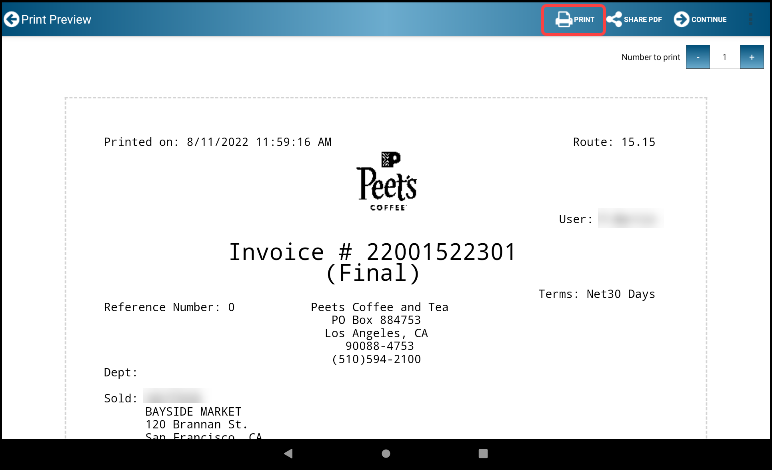
- Print a copy of the Invoice for your records
Section 3 - Purchase Orders
3.1 Create Purchase Order
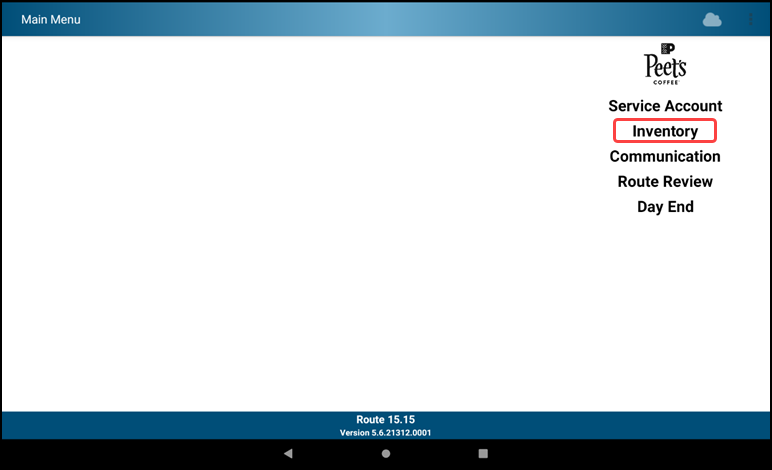
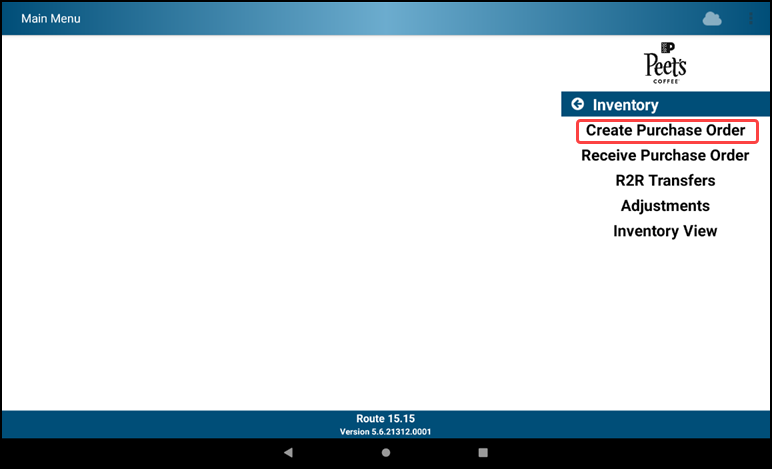
- Tap inventory
- Tap Create Purchase Order
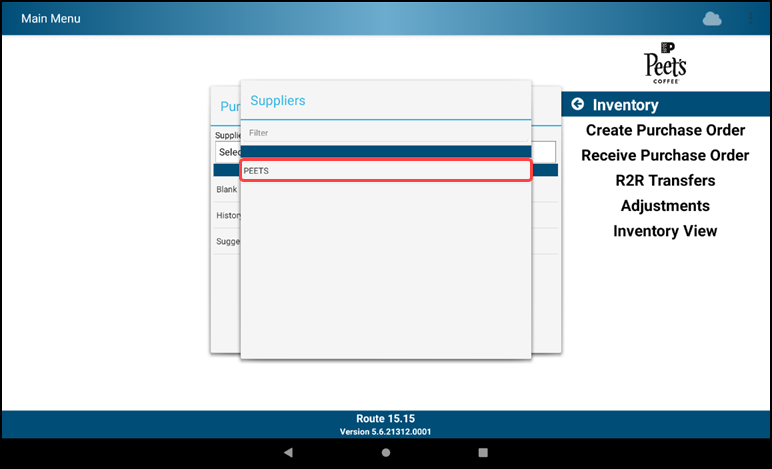
- Tap Supplier - PEETS
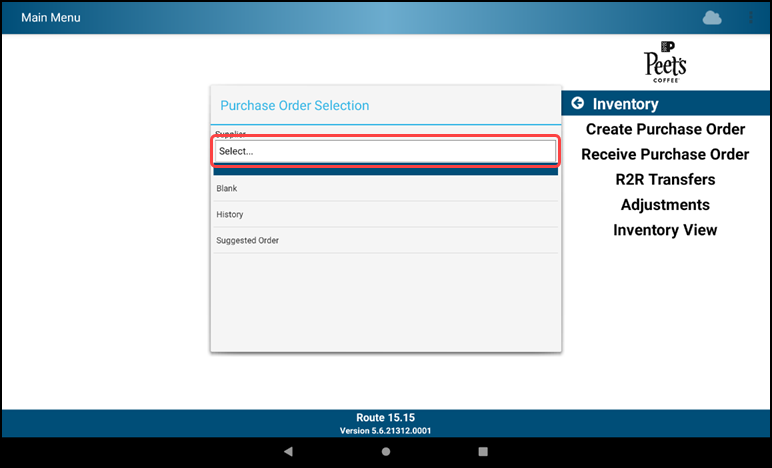
- Tap PEETS from the menu
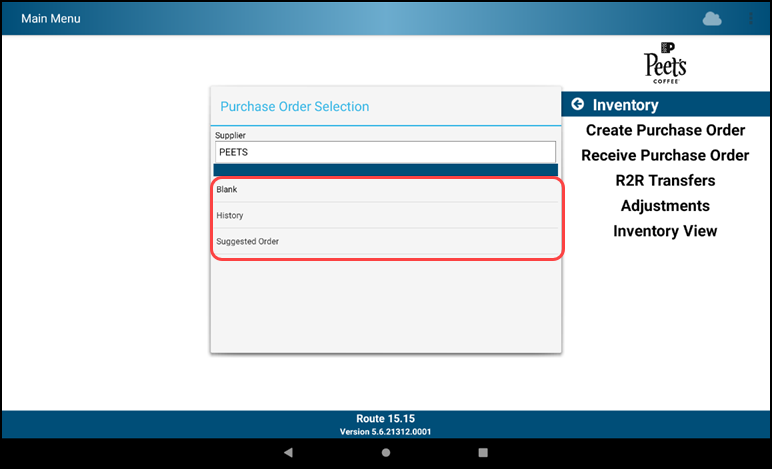
- Select starting point for order:
- Blank - no items populated
- History - use a previous order as a starting point and add/remove items as needed
- Suggested - create an order to par levels (we are not using this)
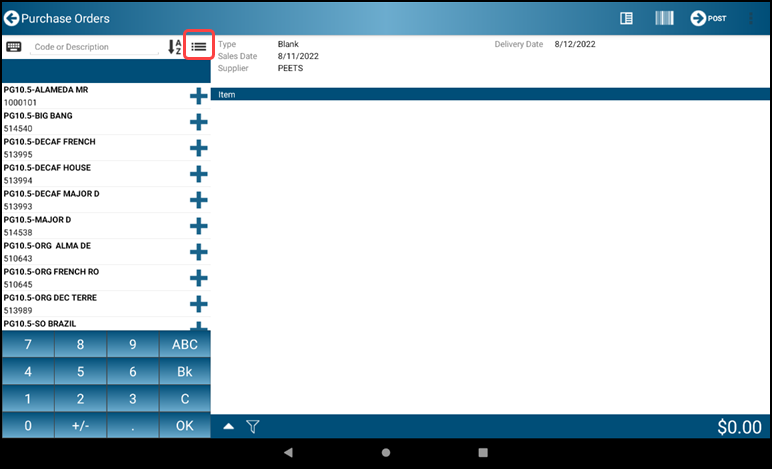
- Choose an item to add to the PO
- Select or scan item number
- Use the A-Z Sort icon to order by item Description or Item Number
- Use the Category Sort icon to filter results by category or view the full catalog
- Select or scan item number


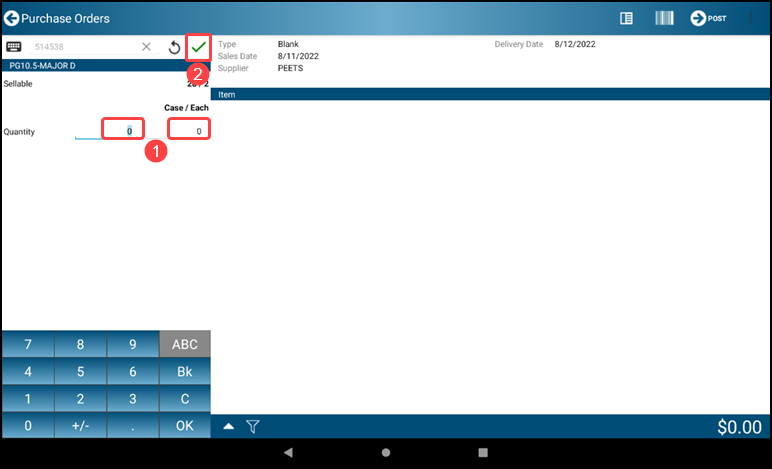
- Adjust the item's quantity
- Use the onscreen keyboard to adjust the quantity
- Be sure to use the initial cases field and not the eaches field that is used for invoicing
- To return to the Catalog without confirming the quantity, tap the Return-Arrow
- Tap the green checkmark to complete the line
- Or press OK twice (once to advance the cursor and again to confirm the quantity)
- Use the onscreen keyboard to adjust the quantity
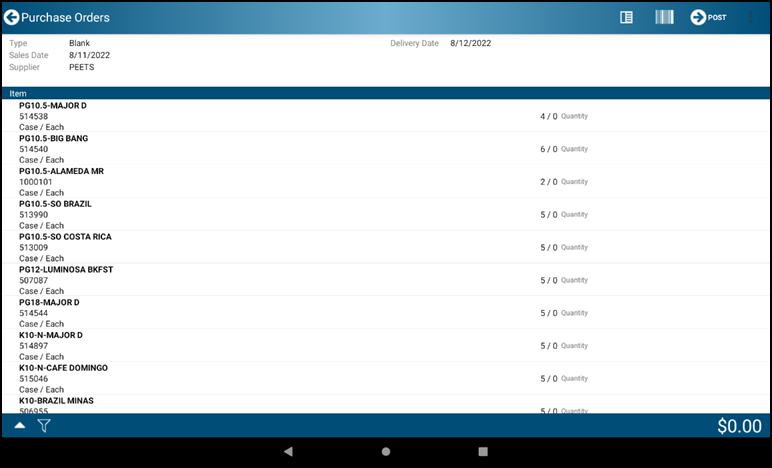
- Tap the List-Toggle icon to review the order
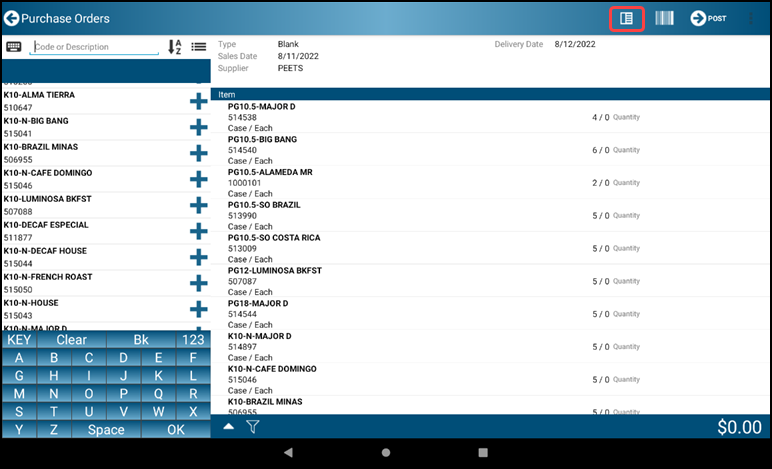
- Click on the ellipsis and click on Preview
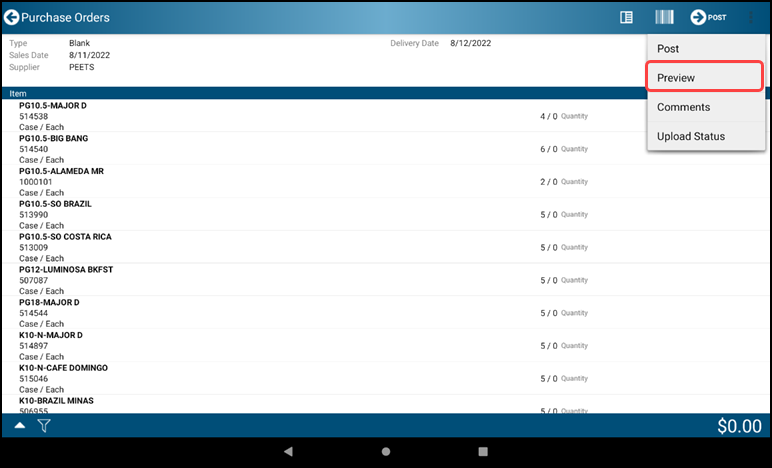
- Be certain your PO is ready for submittal - once submitted it cannot be voided
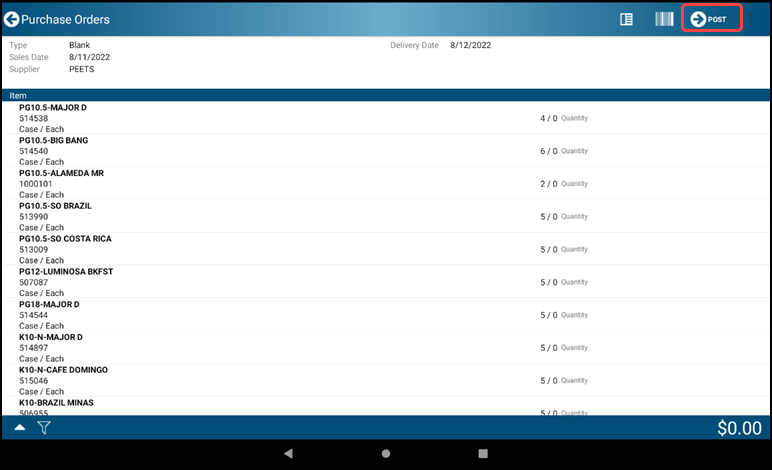
- Tap the Finalize-Arrow POST icon to post the order
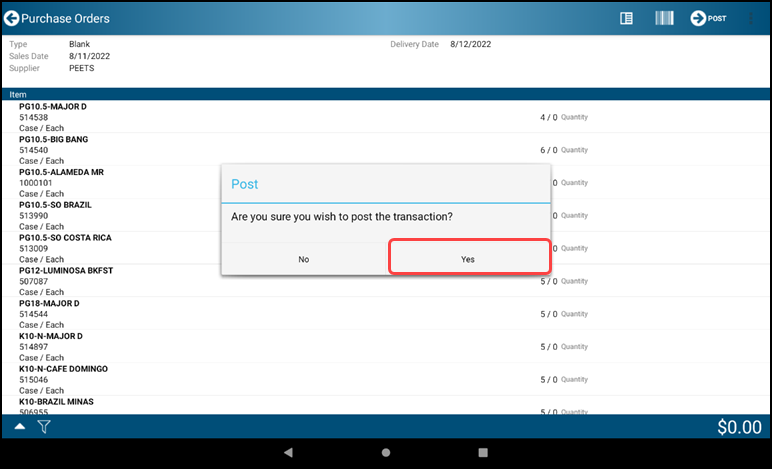
- Tap Yes to post the transaction
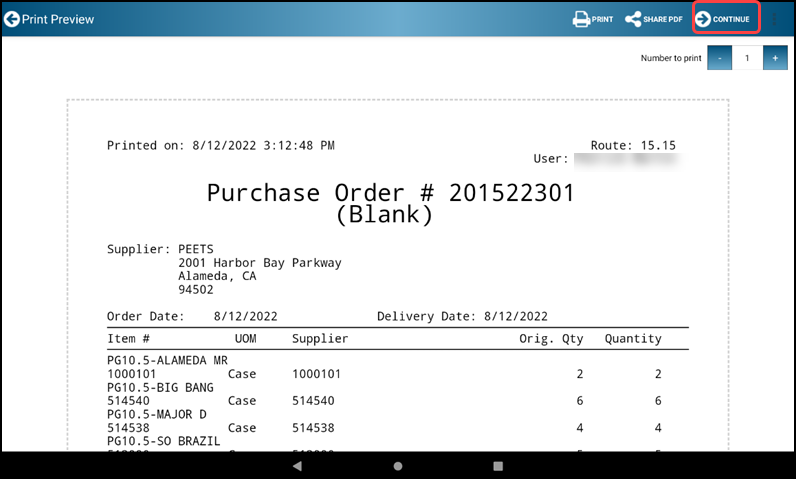
- If you want a paper copy of the PO, tap the Print icon
- You may use the Share PDF icon to send the PO digitally
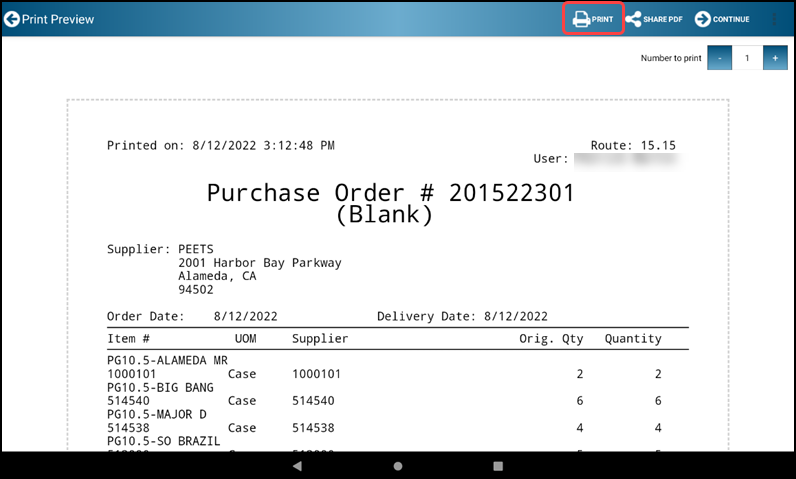
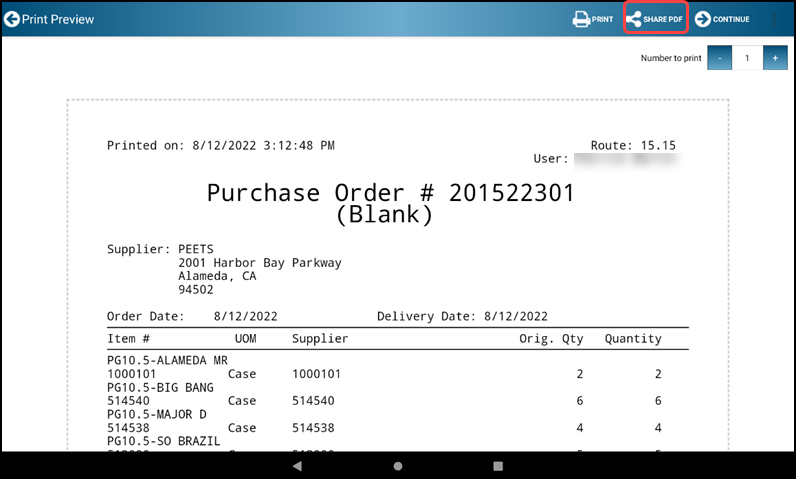
- To return to the main Menu, tap the Finalize-Arrow CONTINUE icon to complete the transaction
- Warning:
- You can submit as many orders as you wish up until your order day. You will receive multiple POs for those orders
- If within your order day you missed an item to add and you already submitted the order, you can create a new order
- You cannot ask DSD support to add or delete an item on your order once it has been processed
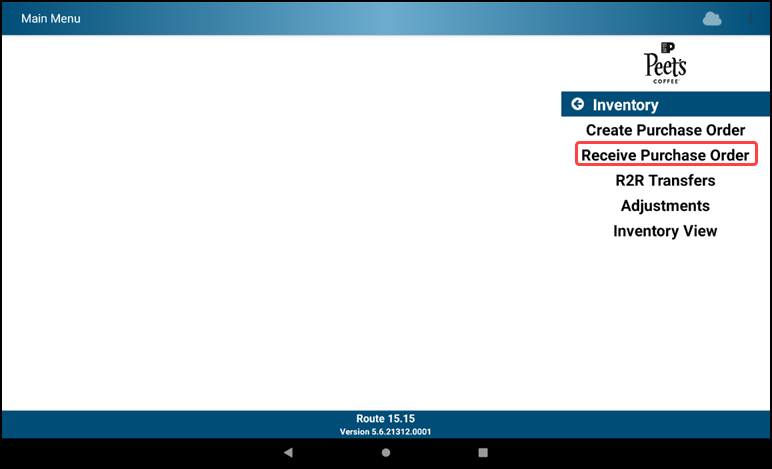
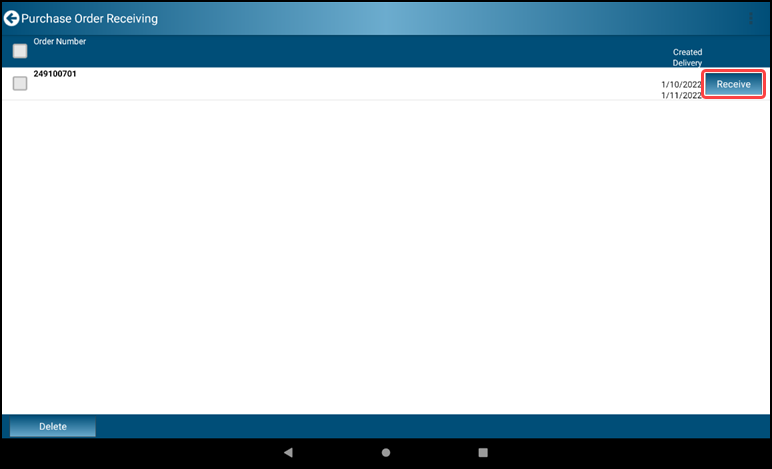
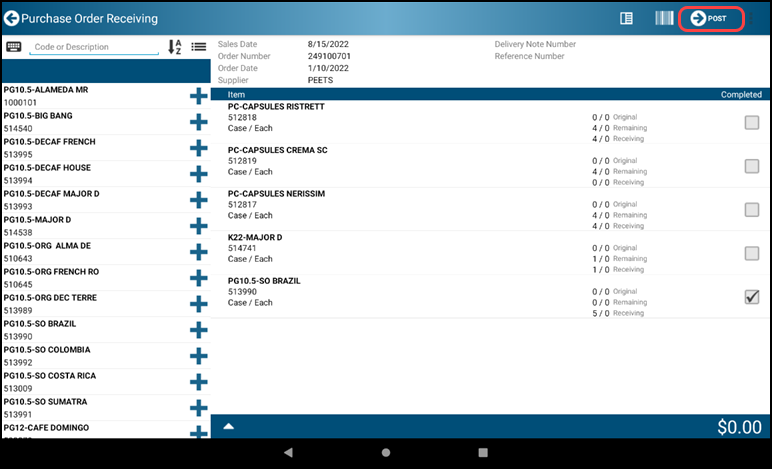
3.2 Receive Purchase Order
- Tap Receive Purchase Order on the main Menu
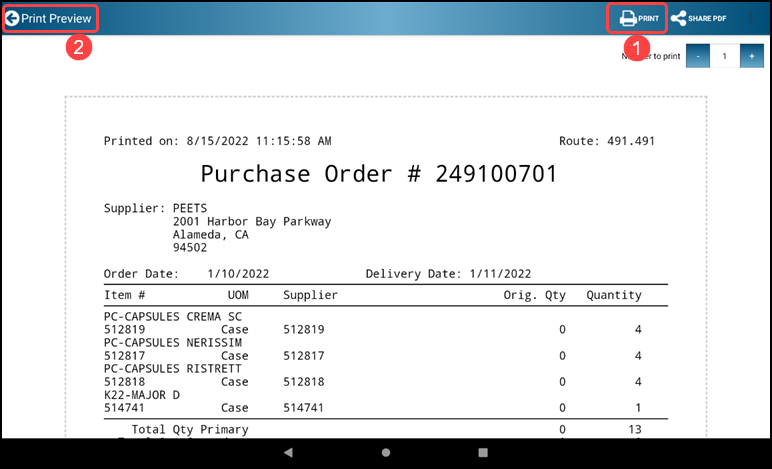
- To Preview and Print a PO prior to confirming Items and Qtys:
- Tap on the white space between the PO # and the Created Delivery dates
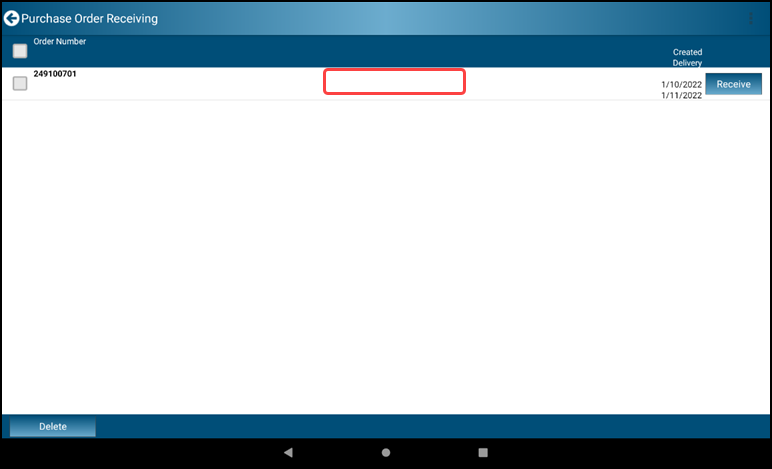
Print a preview of your PO and then tap the back arrow button
- Open the correct PO by tapping the "Receive" button on the correct line
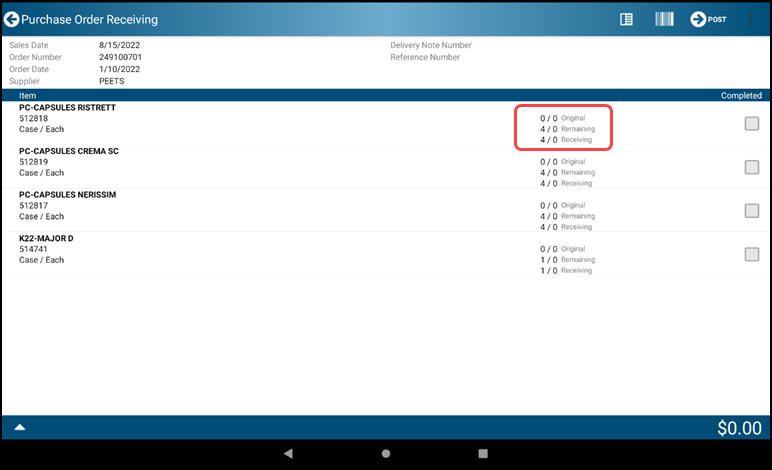
- Physically inspect and count the delivered shipment to confirm the Items and Qtys
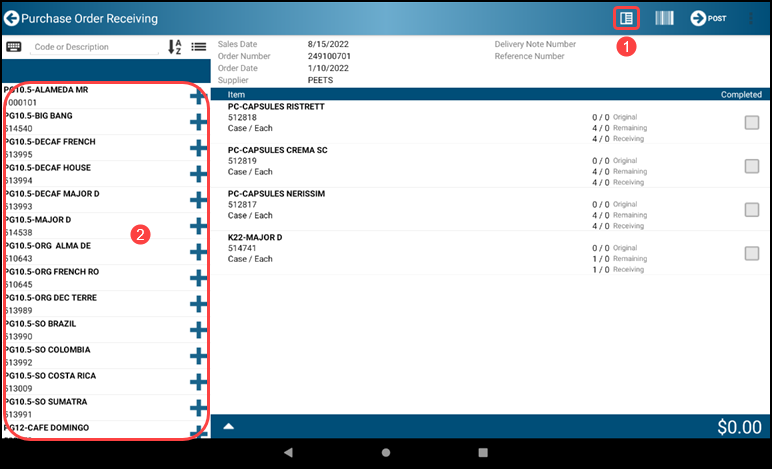
Tapping the toggle icon will hide the items shown on the left side of the screen


- When fewer than the expected quantity of ordered items arrive:
- If you expect the items to arrive in a later shipment, enter the delivered Qty and the line will remain open while you wait for the remainder of the items
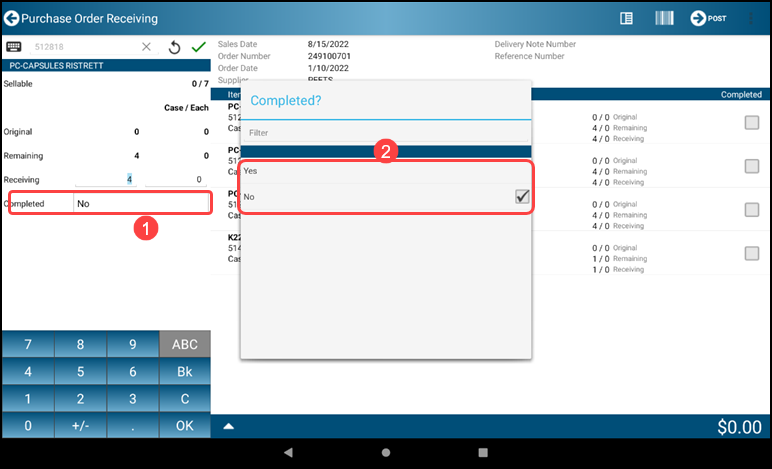
- If you don't expect the items to arrive at all, select the order line and enter the delivered Qty and select "Yes" in the "Completed" field to record the short shipment
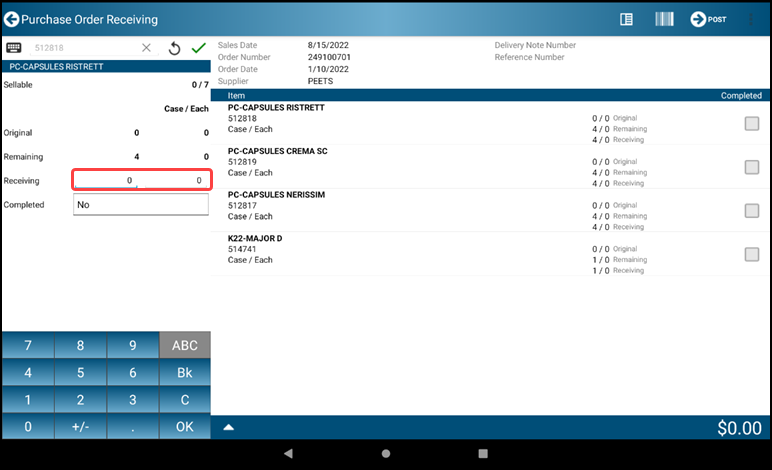
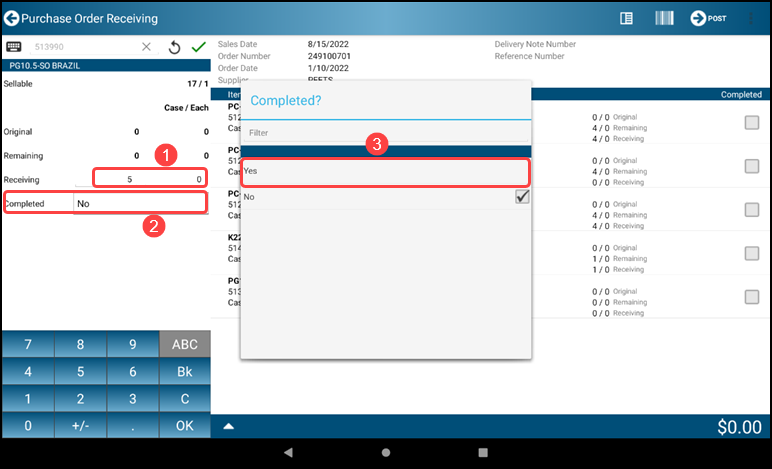
- If an item is received that was not ordered, tap the View-Toggle to pull up the Product Catalog. Tap to enter the Item and update the Qty received
- Once the QTYs have been updated, you MUST tap on the "Completed" field and update the status to "Yes"
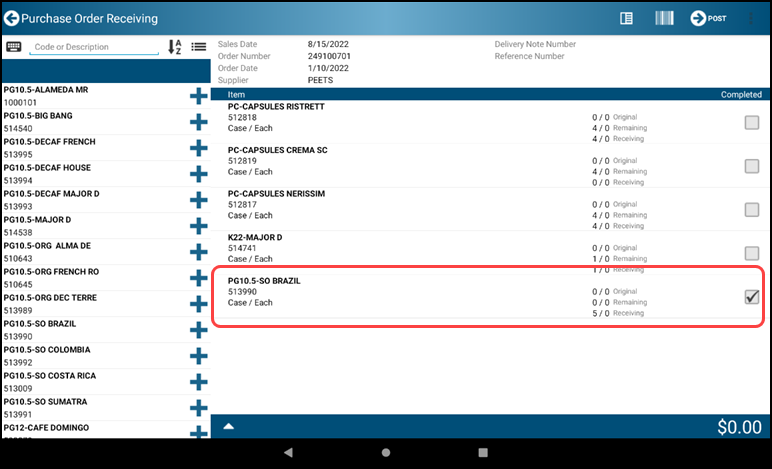
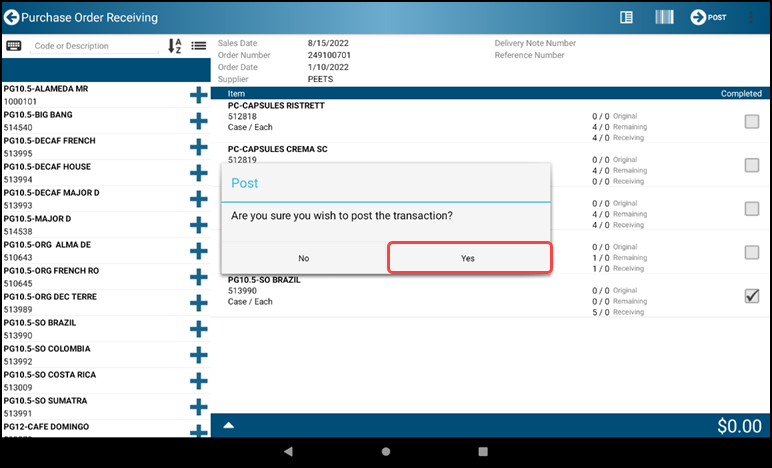
- When all the Items and Qtys match what was delivered, tap the Finalize-Arrow CONTINUE icon to continue
- Tap yes to post the transaction
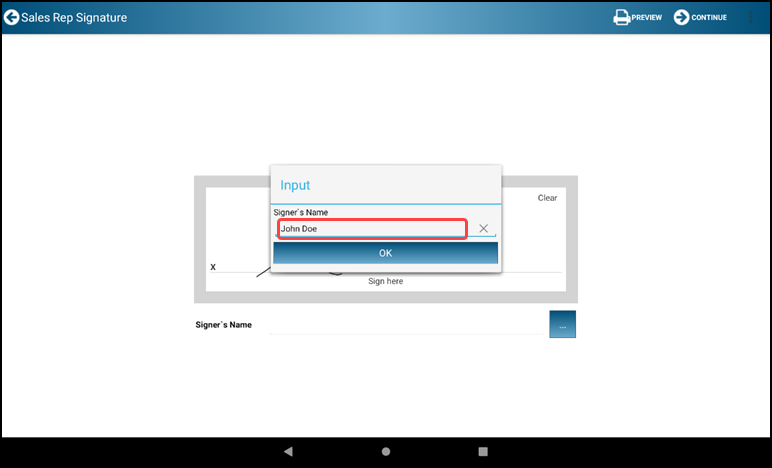
- Draw your signature and type in your name in the available fields
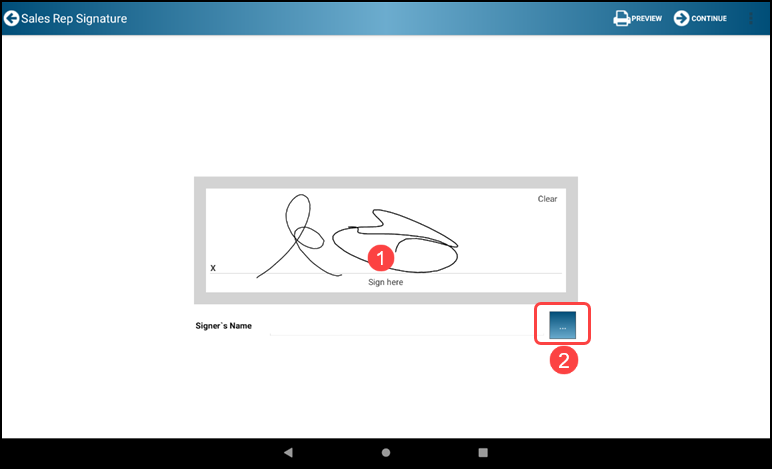
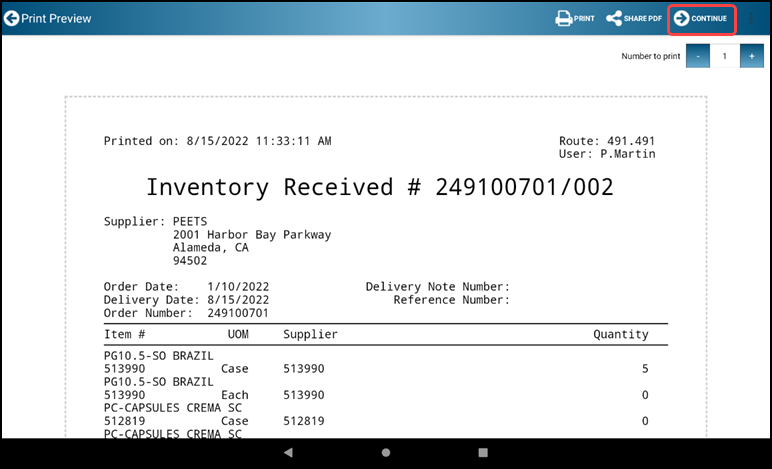
- Tap the Print or share button to print out a copy or share a copy of the received purchase order
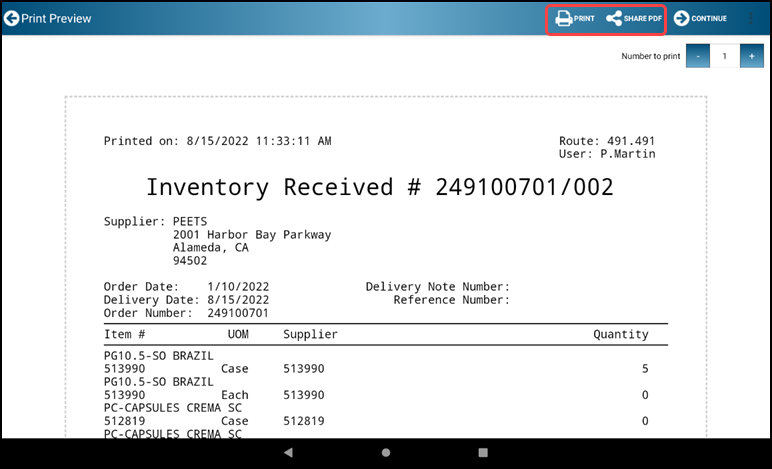
- Tap Finalize-Arrow CONTINUE icon to finish and return to the Main Menu
Section 4 - Inventory and Reporting
4.1 Route to Route Transfers
These steps outline how to perform an adjustment between two routes. One route creates an inventory adjustment to send inventory to another route (transfer out). The second route creates an inventory adjustment to receive the transferred inventory.
TRANSFER OUT
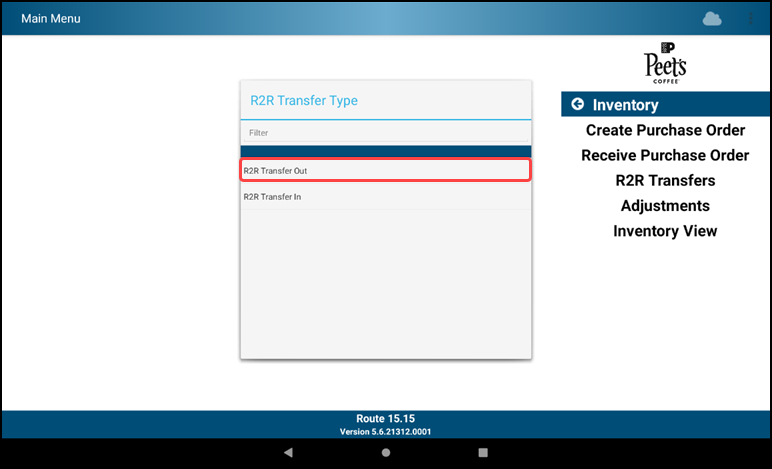
- Tap Inventory from the Main Menu

- Tap R2R Transfers

- Select Route Transfer Out
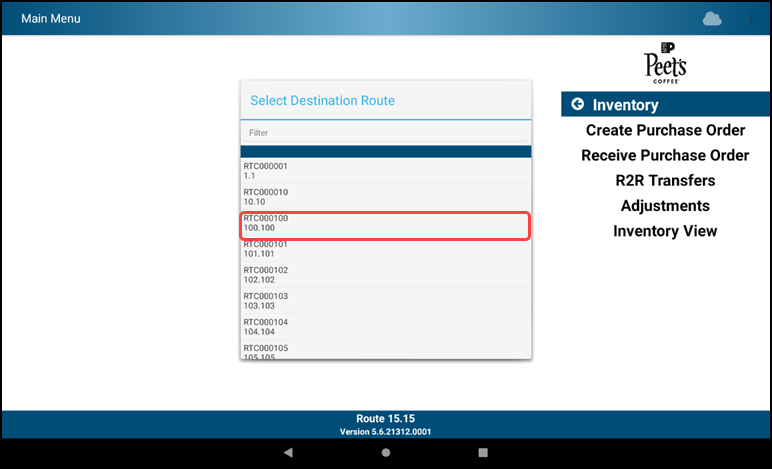
- Select Route you are Transferring To
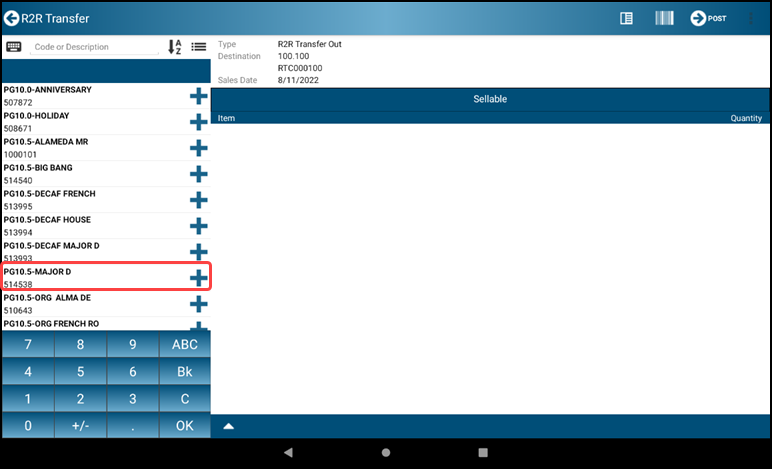
- Select product to be transferred
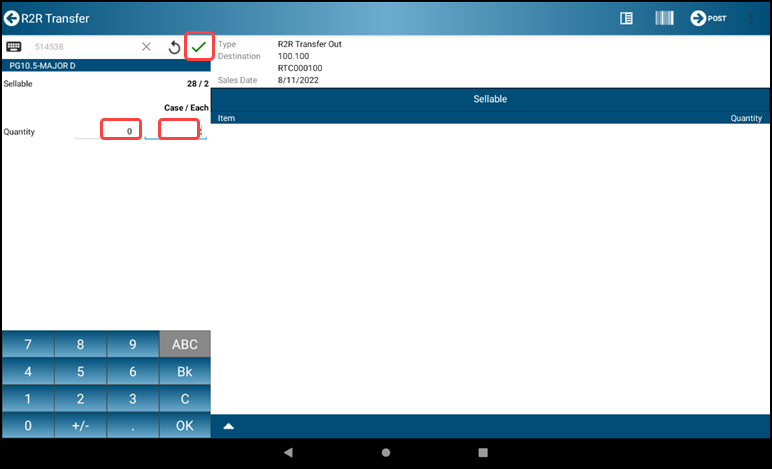
- Choose Qty to be transferred and Tap the green checkmark
- Repeat for each product
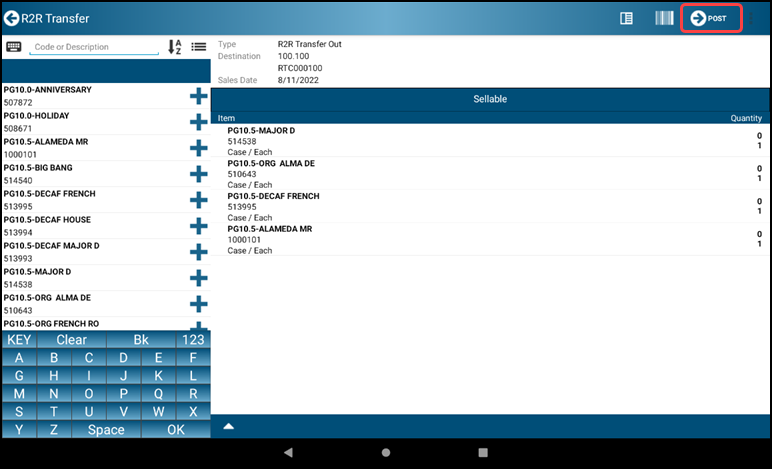
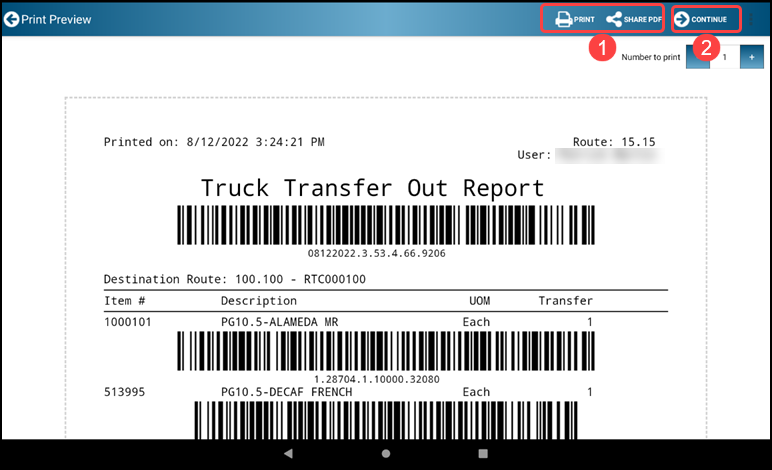
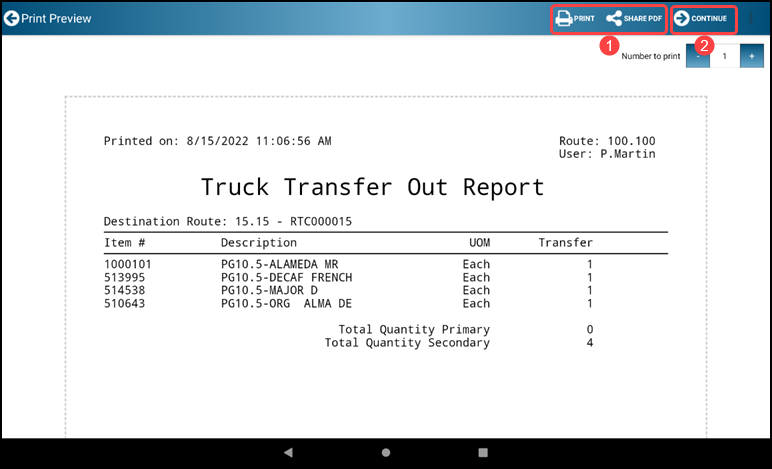
- When finished, Tap the Finalize-Arrow Post icon. This will create a Truck Transfer Out report
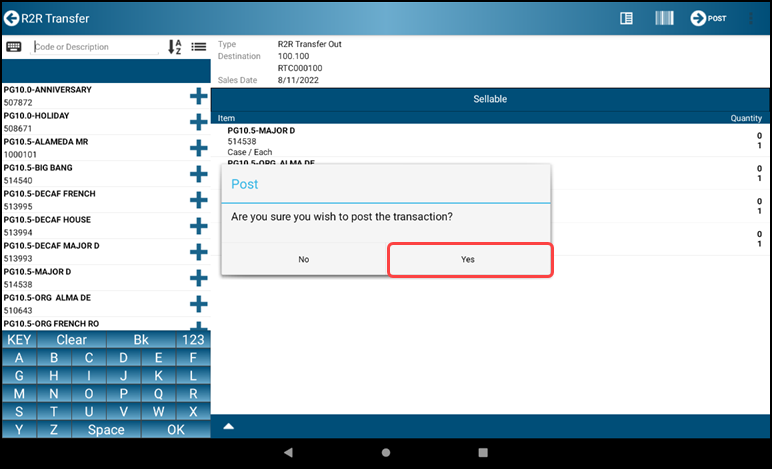
- Tap yes to post the transcation
- You may print or email the report using the Print and Share PDF icons
- Tap the Finalize-Arrow CONTINUE icon to complete the Transfer Out Process
TRANSFER IN
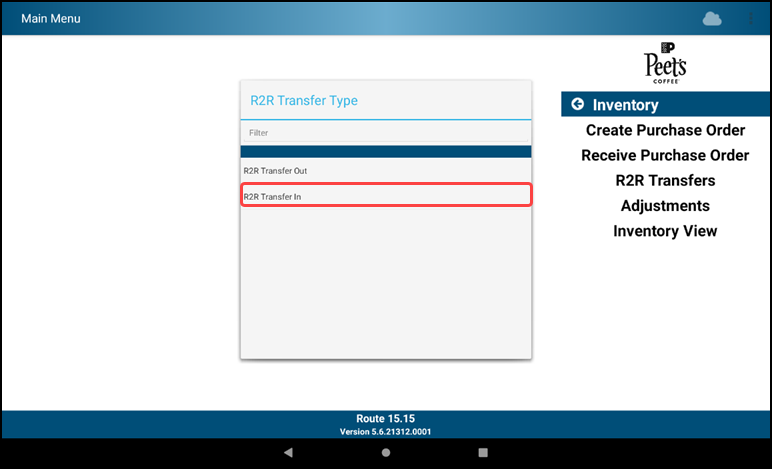
- Tap Inventory from the Main Menu
- Tap R2R Transfers
- Select Route Transfer In
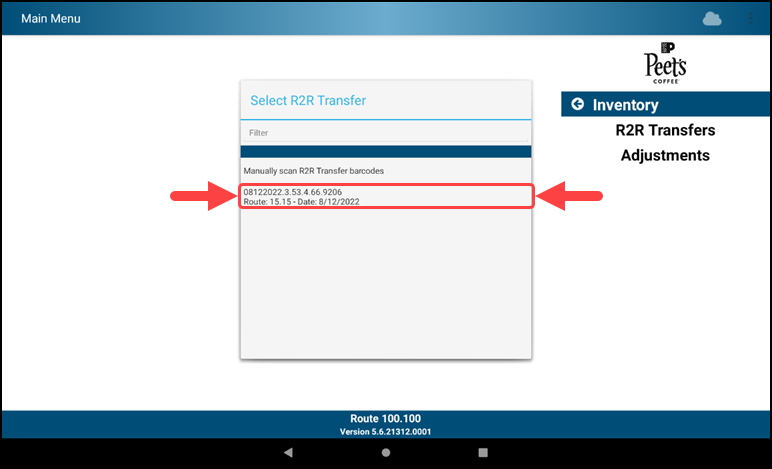
- Select the desired transfer from the Select Truck Transfer window
- Review the Transfer product listing
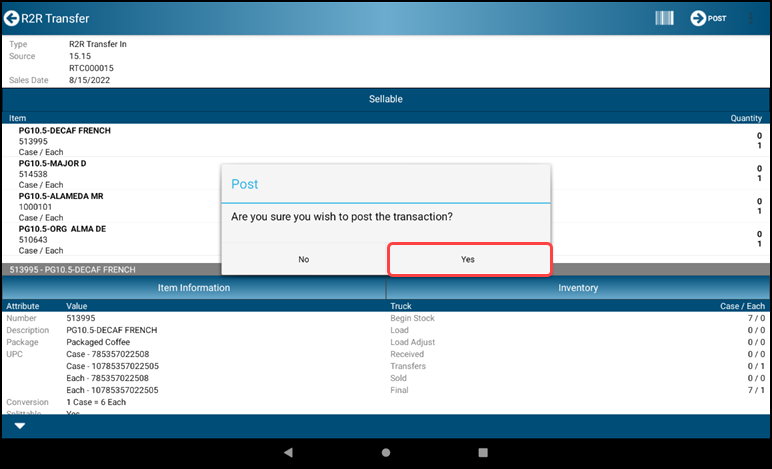
- Select Finalize-Arrow POST icon to post Transfer In
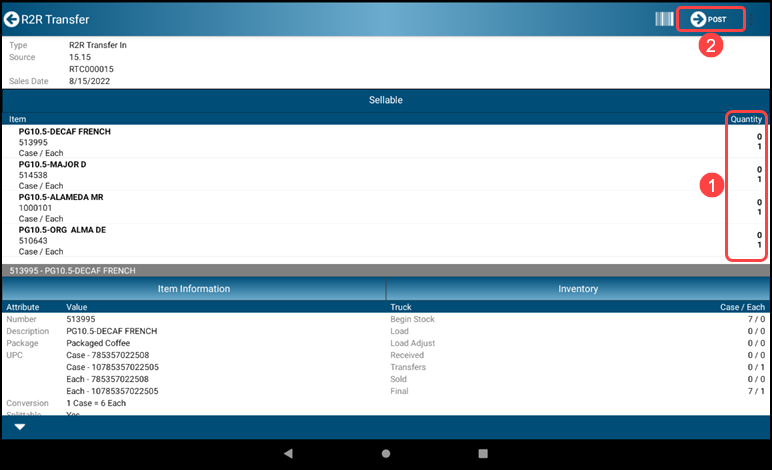
- Tap yes to post the Route Transfer In
- Review Transfer In report with options to PRINT and SHARE PDF
- Tap the Finalize-Arrow CONTINUE icon to complete the Transfer In process
4.2.1 Inventory Adjustments
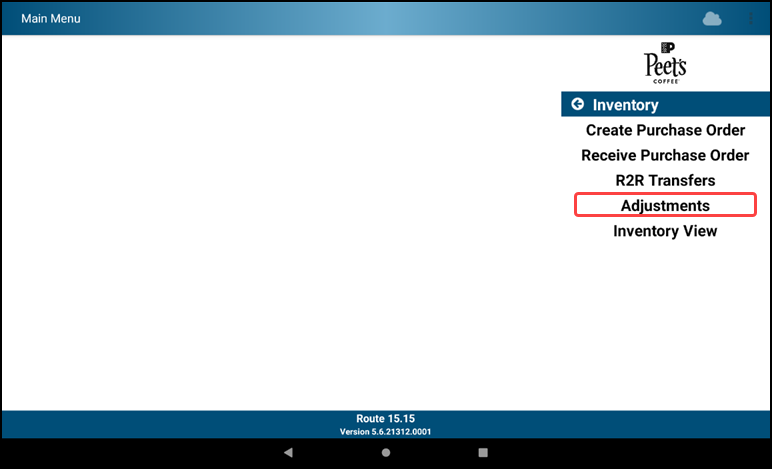
- Tap Inventory
- Tap Adjustments to adjust inventory for damaged or out of code product
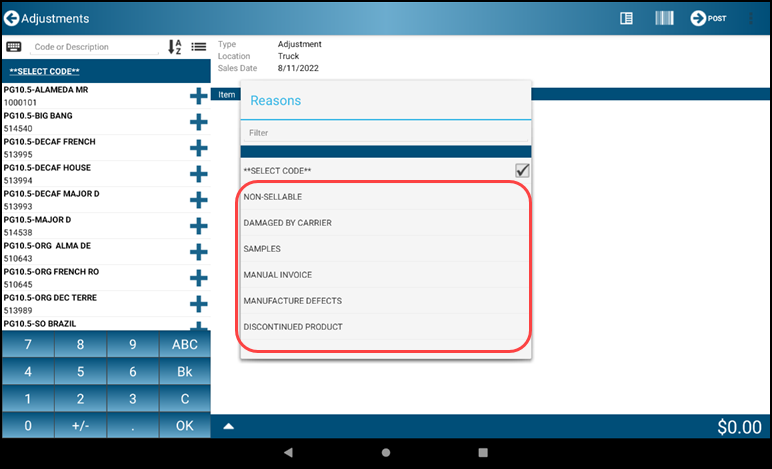
- Tap Select Code to select the reason for the adjustment

- Select the specific reason code for the adjustment
- Select items and quantities to adjust
- Select or scan item number
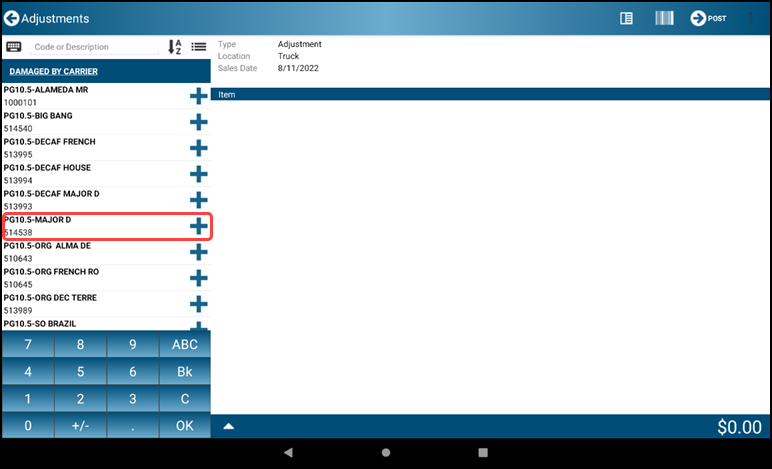
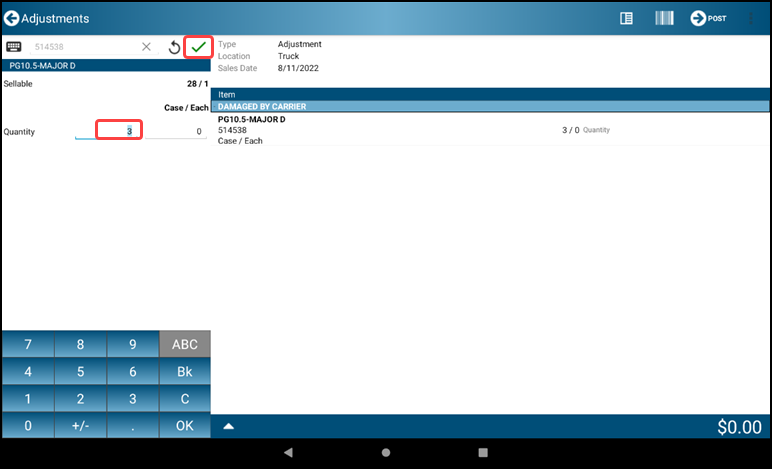
- Select quantity to adjust
- Tap Green Checkmark to complete the line
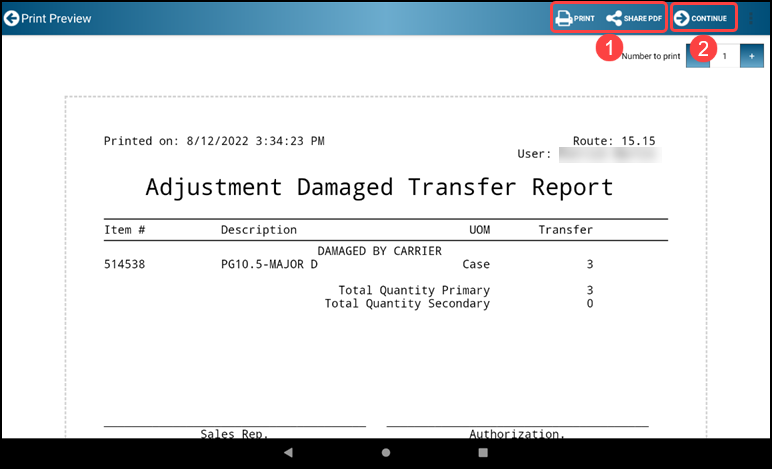
- When all items and associated Qtys have been entered, Tap Finalize-Arrow POST
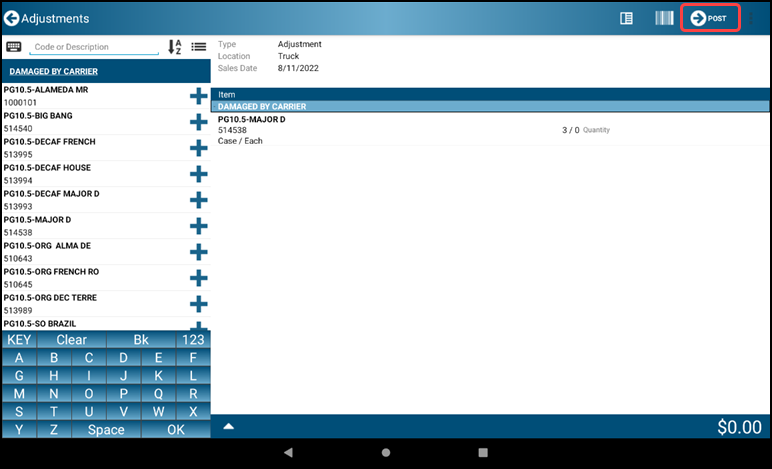
- The Inventory Adjustment Report is displayed with options to print or share. Tap Finalize-Arrow CONTINUE to accept the report quantities and return to the Main Menu
4.3 Physical Inventory
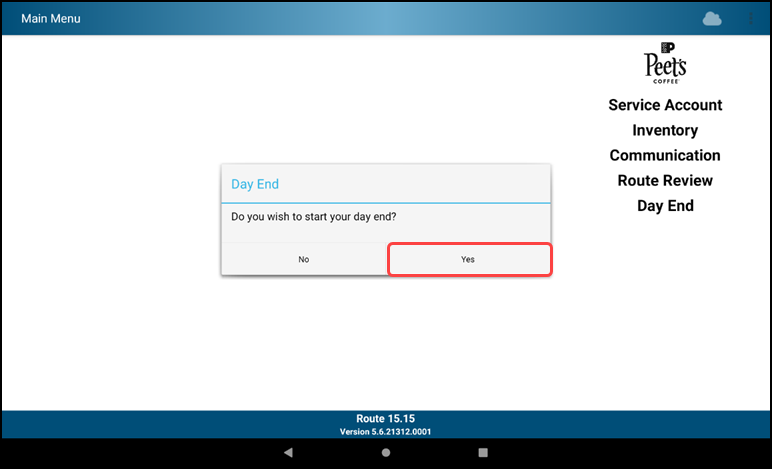
- Tap Day End

- The popup appears > Do you wish to start your day end? > Select "Yes
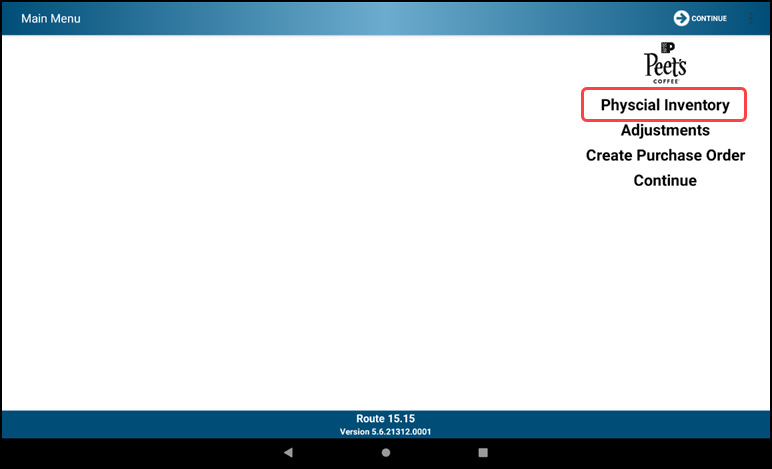
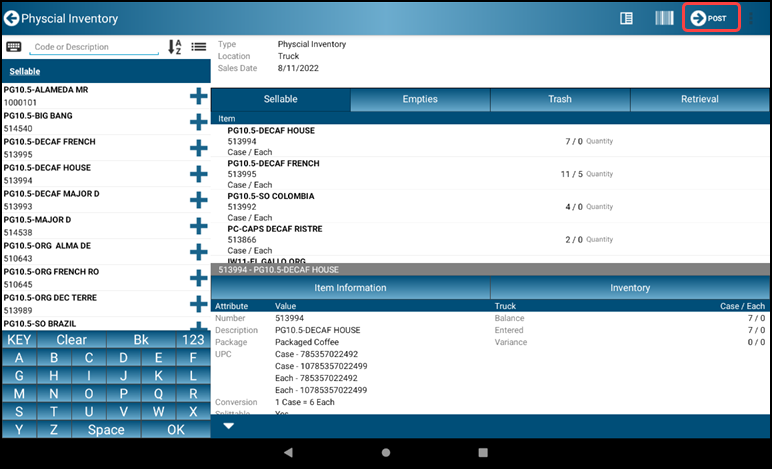
- Tap Physical Inventory - This is the required selection on days you are scheduled for inventory
- Count physical inventory of sellable product
- Repeat for each product
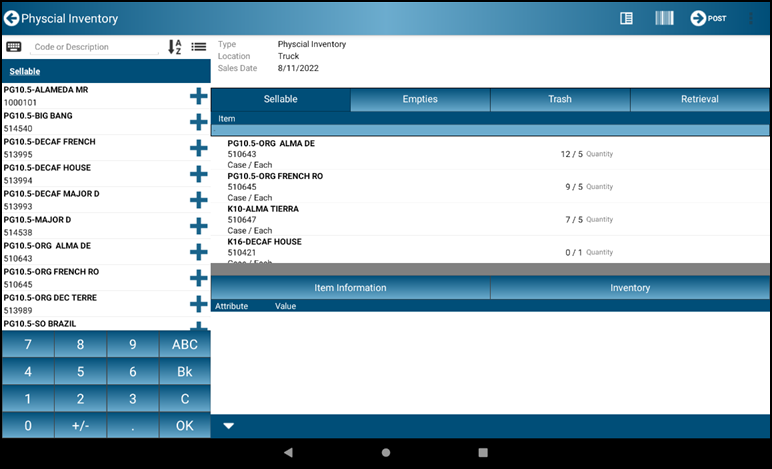
- Tap on an item to view detailed information

- Tap on an item in to update the quantities
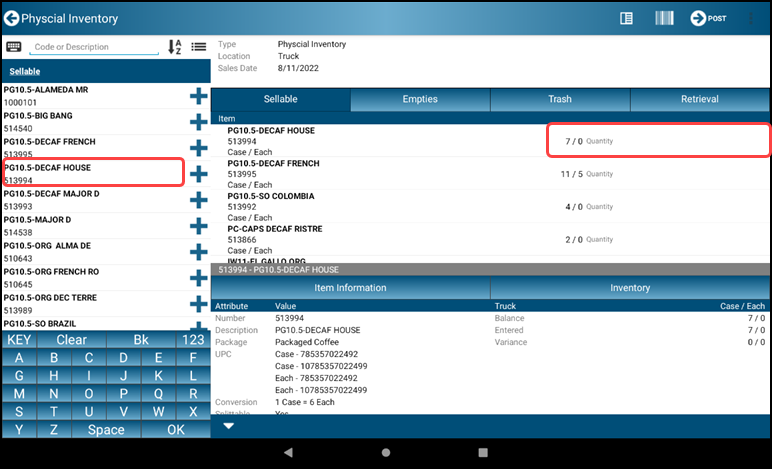
- Choose the desired item and enter the QTY by case/each and Tap OK
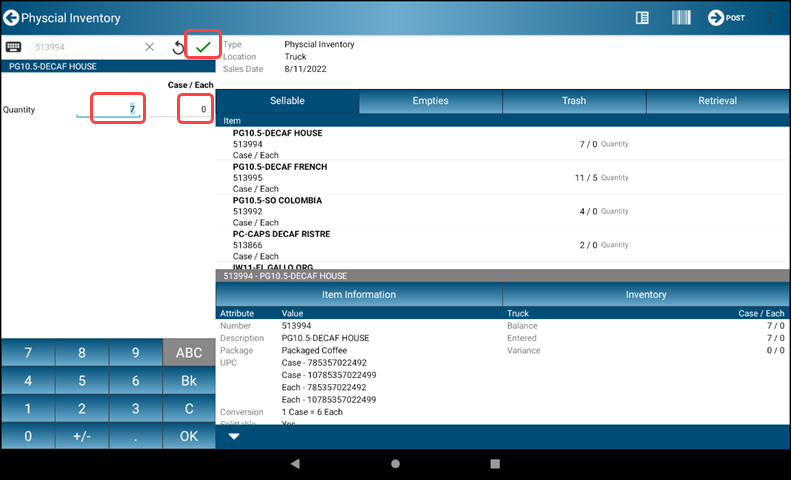
- When finished Tap the Finalize-Arrow POST icon
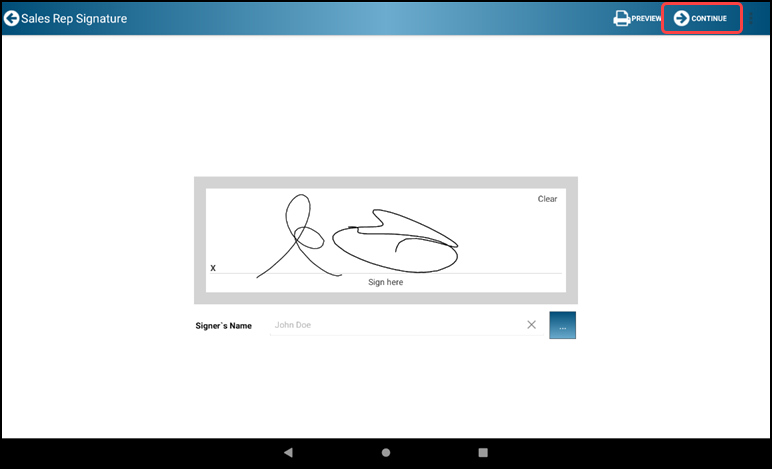
- Sign in the signature box, tap the ... to type in your name
- Sign in the signature box, tap the ... to type in your name to type your name and tap the OK button
- When finished Tap the Finalize-Arrow CONTINUE icon
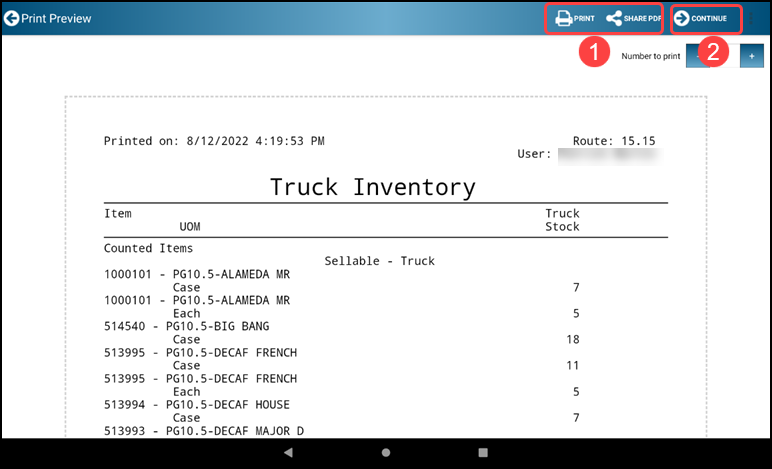
- This will create an Inventory Report
- The PRINT icon is available for printing
- Tap the Finalize-Arrow CONTINUE icon to complete the Physical Inventory transaction
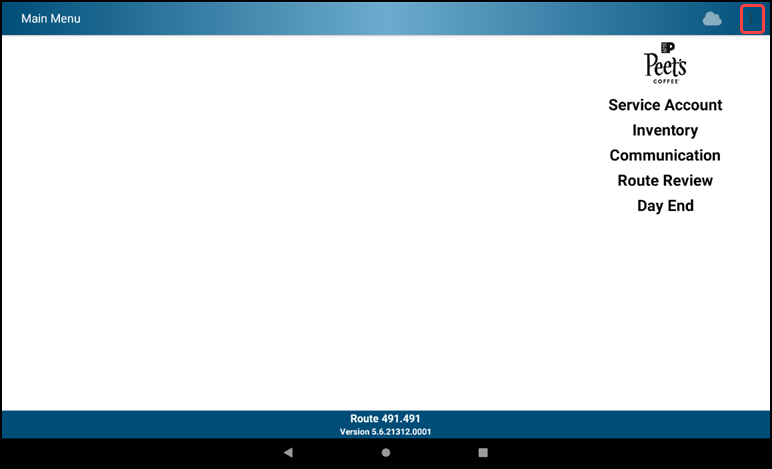
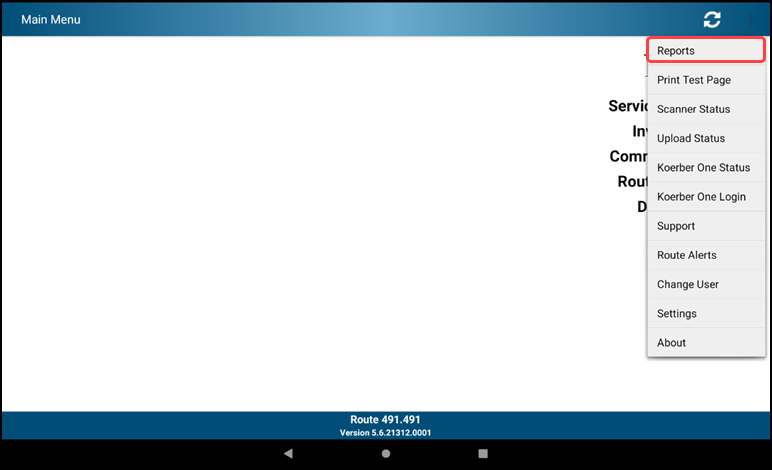
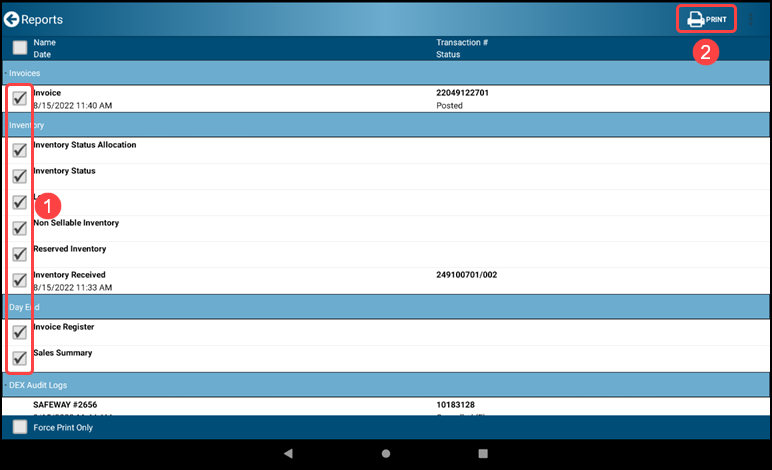
4.4 Reports
- From the Main Menu click the Ellipsis/Menu Dots and select Reports
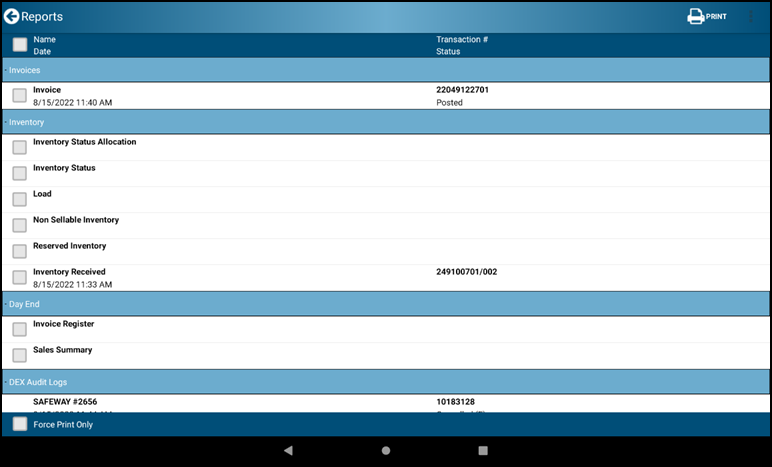
- All reports will be visible
-
Report Definitions:
INVOICES
- Invoices – All invoices created in the current day
INVENTORY
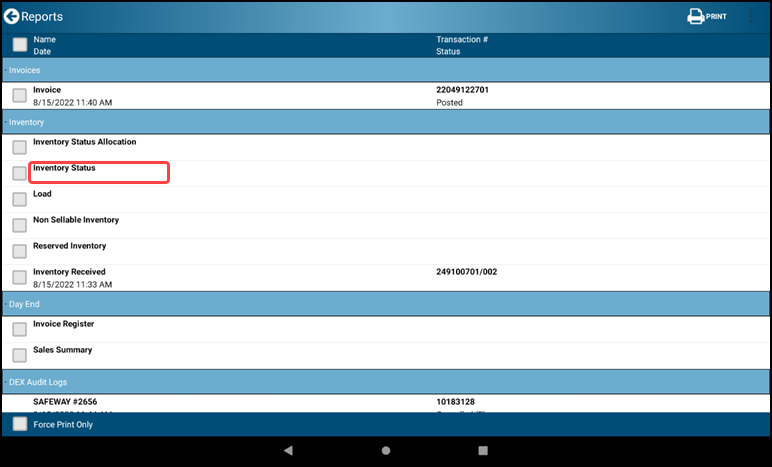
- Inventory Status – Current inventory count by item. Includes current day activity: beginning inventory, transfers, received, sales and buybacks.
- Load – Same as inventory status, but doesn’t include sales or buybacks
- Non Sellable Inventory – Returns by item for current day
- Route to Route Transfer – Reprint Route to Route transfers for current day
DAY END
- Expense – Route expenses – Peet’s is not using this feature
- Invoice Register – List invoices for current day, includes total dollars for the day (net sales)
- Sales Summary – All sales activity for the day: Charge Sales, Cash Sales, Voided invoices, Invoice payments (NA for Peet’s), Account Balances (NA for Peet’s)
- Any report can be viewed in detail
- Tap the print or share pdf icon then tap the back arrow button to return to the Reports screen.
- To print out multiple reports at once, tap on the reports you want to and tap the print button
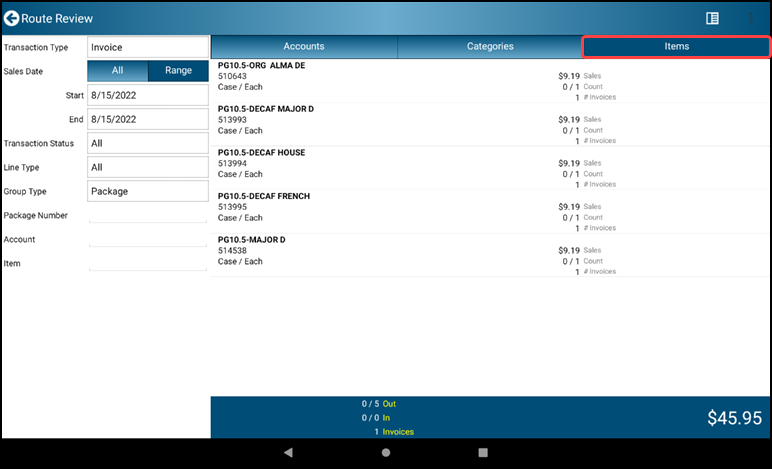
4.5 Route Review
- Tap Route Review
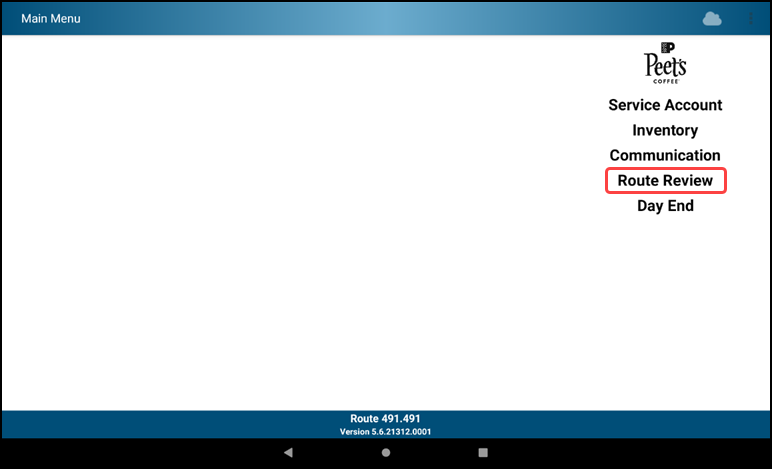
- The following screens show the 3 different views from Route Review. Tap the Back button on any of the screens to return to the Main Menu
- Accounts View
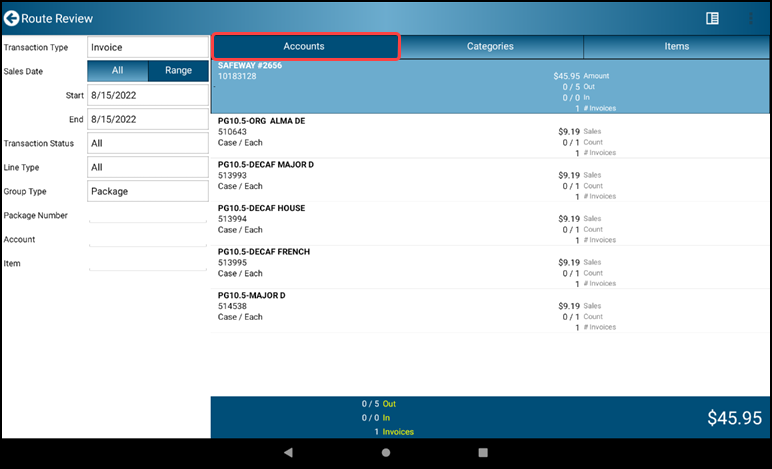
- Categories View
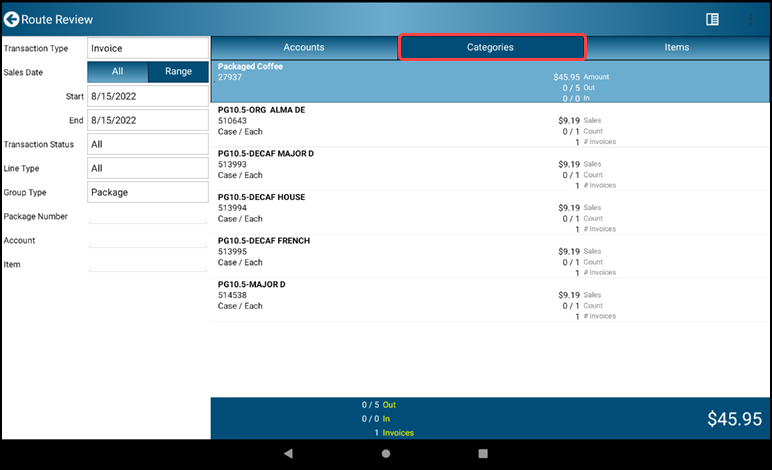
- Items View
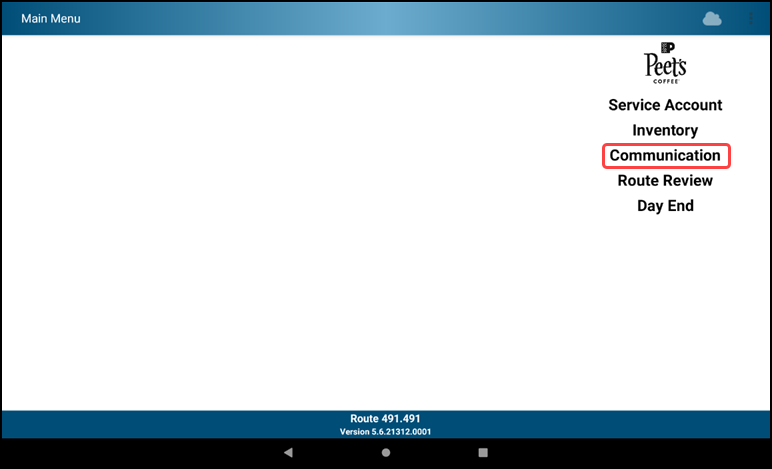
4.6 Communication
Note Communication is an as-needed task used to refresh the mobile device with system updates. It is not a required task outside the Begin and End Day processes.
- Tap Communication on the Main Menu
- Tap the Finalize-Arrow COMMUNICATE on the top to start the communication
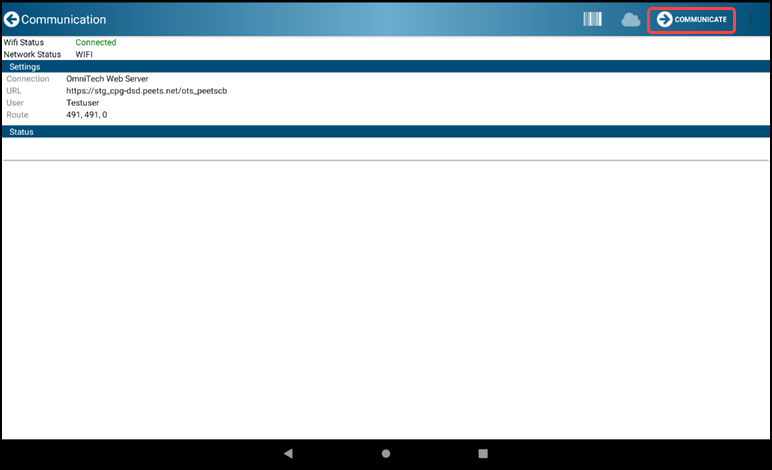
- Tap the “Yes” button to start initiating the data transfer
- You are done when you see the green “Success” message at the bottom of the screen. Tap the back arrow icon to get back to the Main Menu
Section 5 - Day End Tasks
5.1 End Day
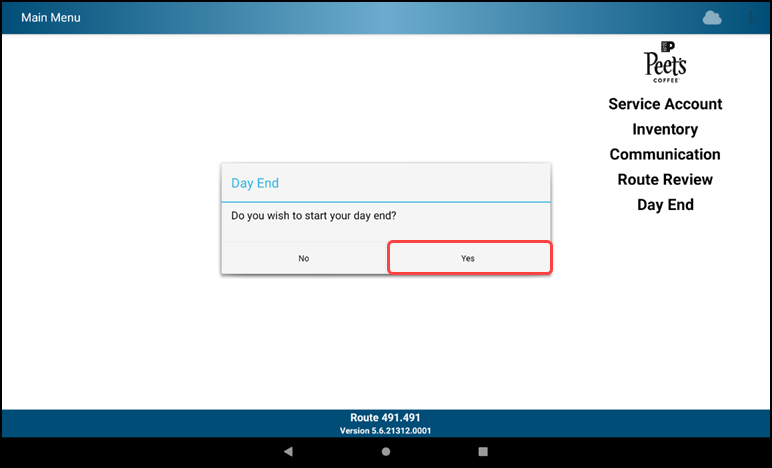
- Tap Day End on the Main Menu

- Pop up box > Do you wish to start your day end? > Yes
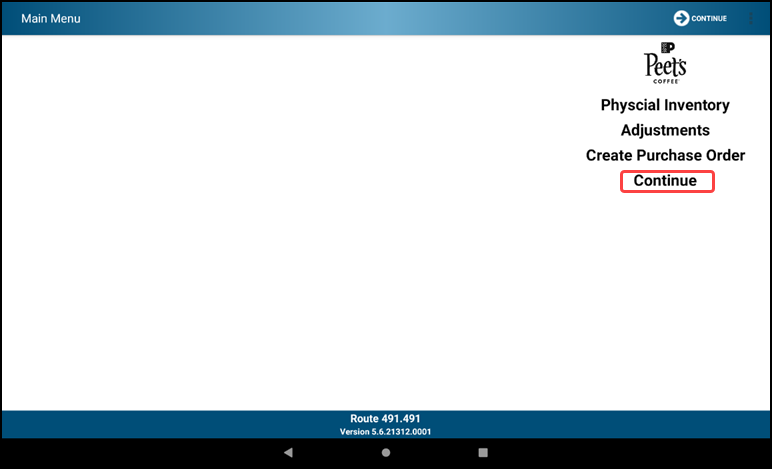
- Choose Continue
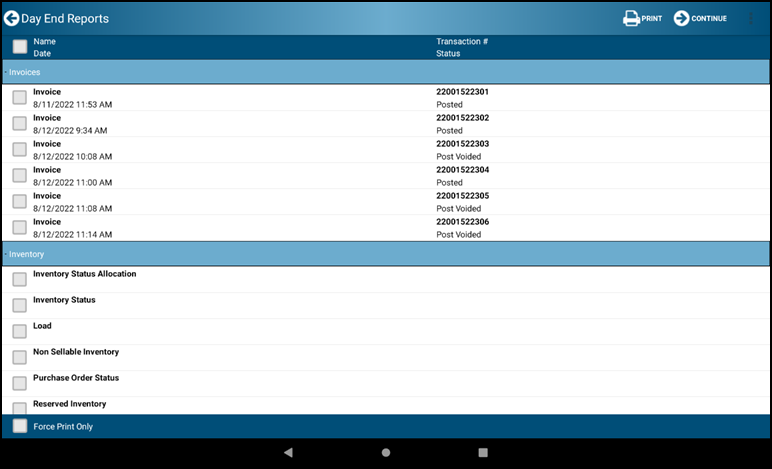
- Day End Reports are generated and displayed
- Any Day End report can be viewed in detail
- Tap on the desired report > Tap the Ellipsis/Menu Dots to print or email
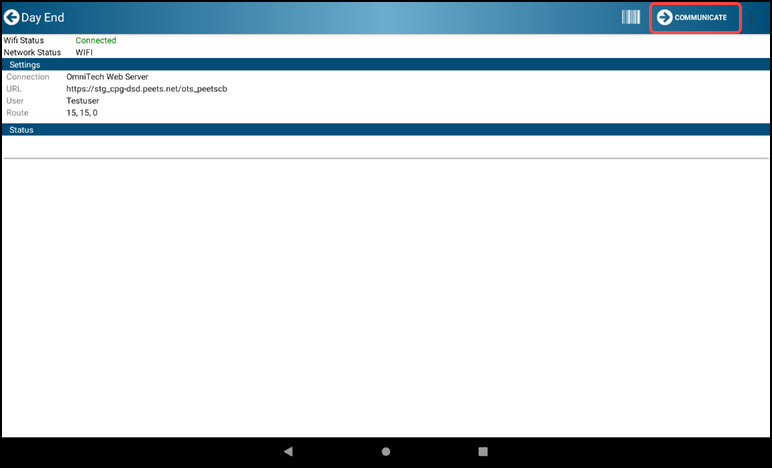
- Tap the Finalize-Arrow CONTINUE to continue to the Connection Screen
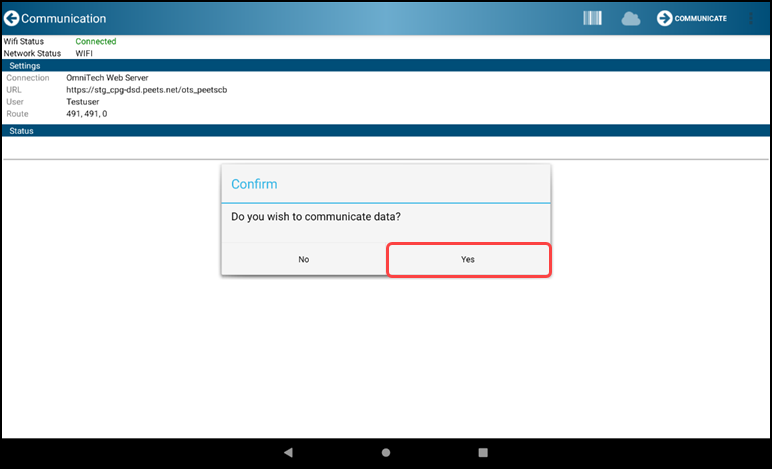
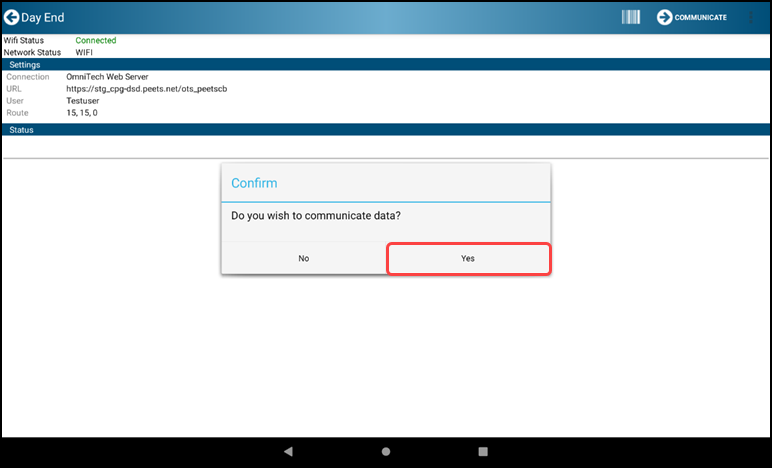
- Tap the Finalize-Arrow COMMUNICATE to bring up the Communication Confirmation screen
- Tap Yes
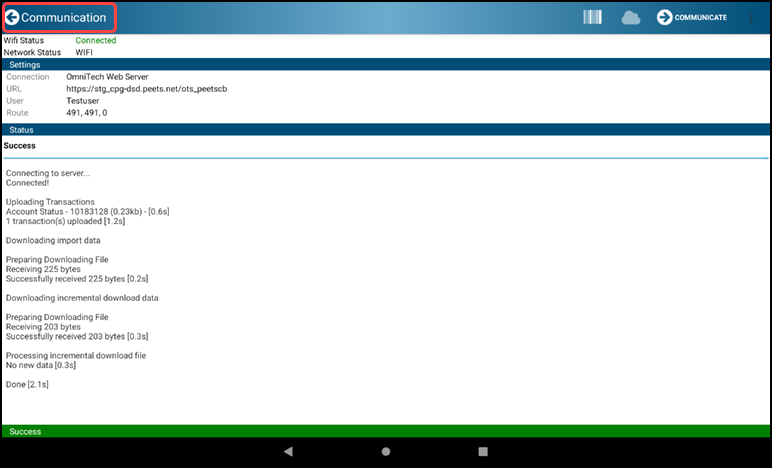
- Communication is complete when you see a green “Success” on the bottom of the screen. Tap the OK button.
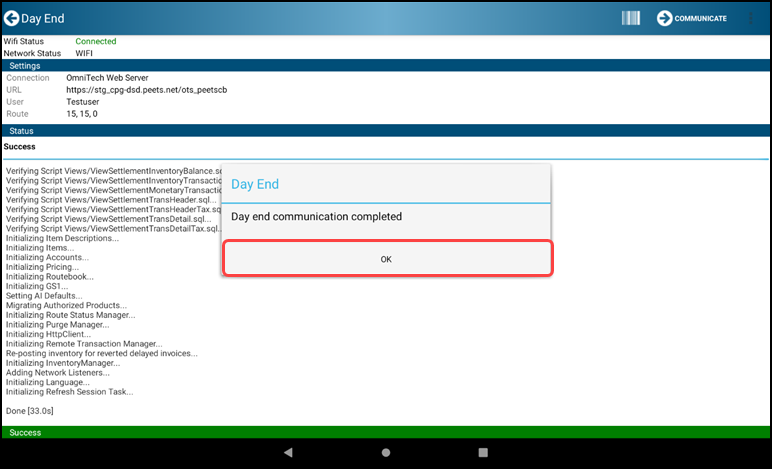
- To verify your data's upload. Tap the Ellipsis/Menu Dots and select “Upload Status” from the Menu
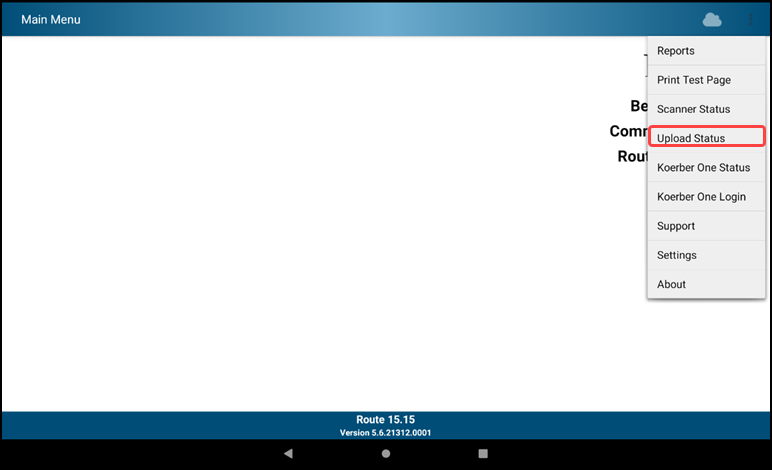
- You will be shown all the items that were communicated and the status

The Day End activities and Communication are complete. Tap the back arrow to return to the Begin Day Menu.
Turn off/power down the device.
Appendix 1 - New Data Features
A1.1 Keyboard
- There has been a change with the Keyboard while typing in Landscape mode. The keyboard is displayed in Full Screen mode. After tapping on the Password field during the Begin Day screen.
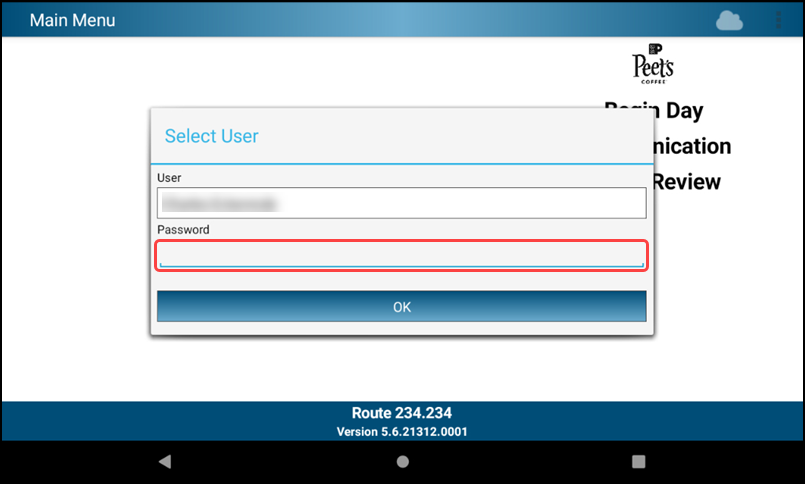
- Enter your password.
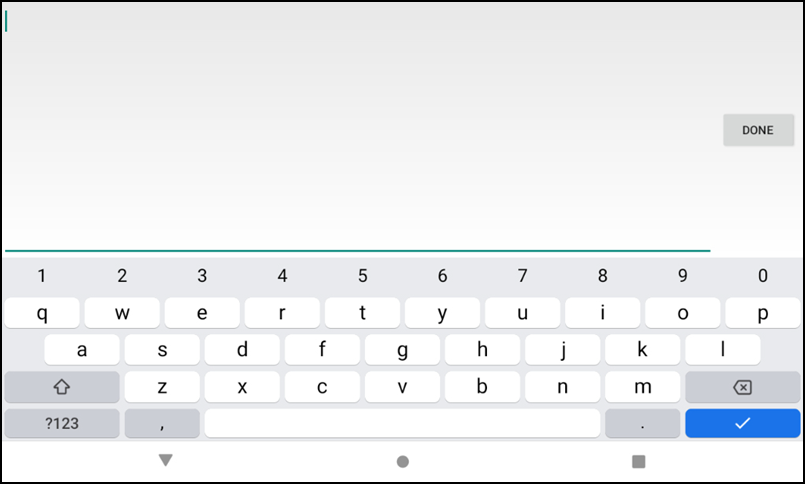
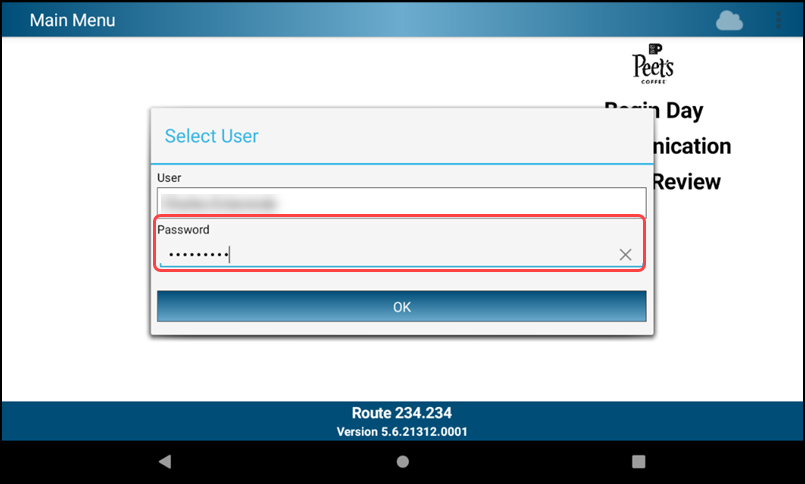
- After typing in your password. To continue tap the down arrow key to return to the Select User Login screen.
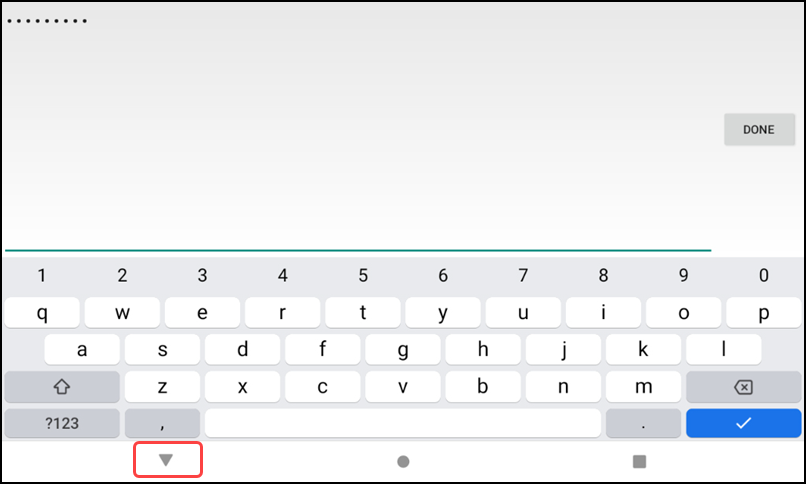
- The password is populated as shown below.
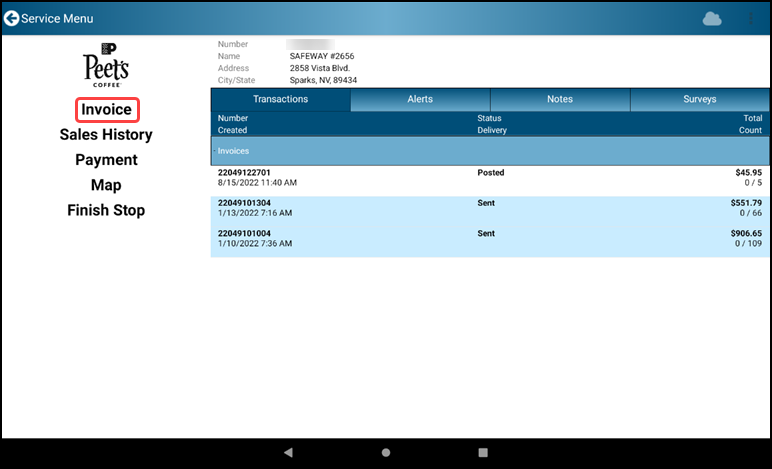
A.1.2 Invoicing Items
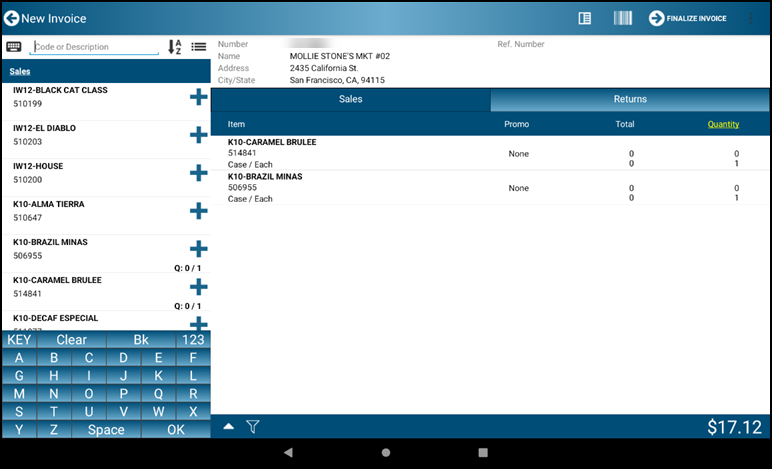
- When Invoice is selected from the Service Account Menu operations on a customer invoice may begin
- Selecting the upward-facing triangle icon towards the bottom of the display screen pulls up the customer item data display section above the bottom of the screen
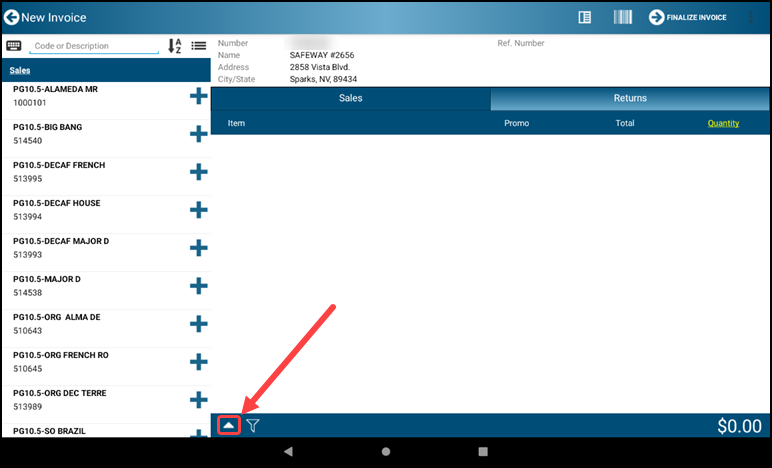
- There are two subsections available for customer item data displays. These sections are configurable, as seen when a header of the subsections shown below is selected
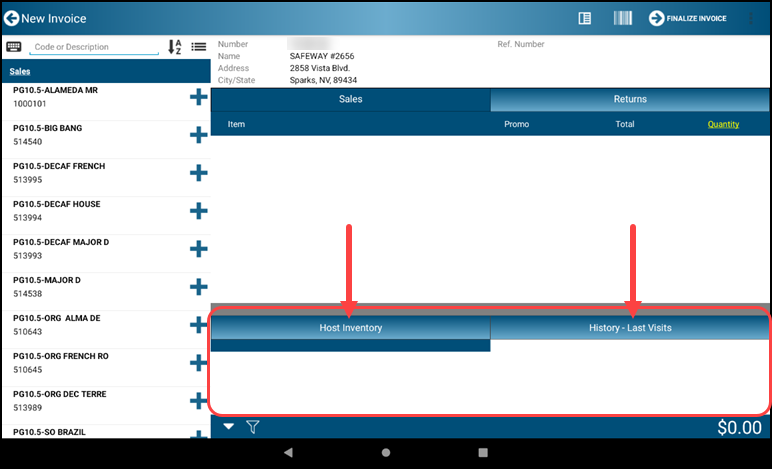
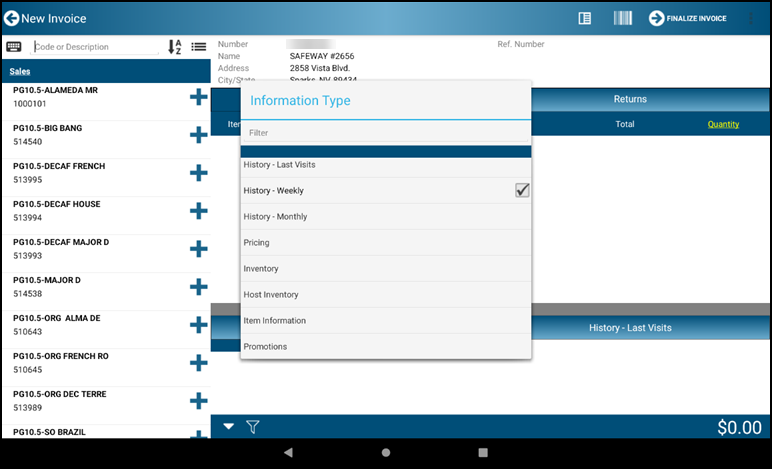
- The item information displays are selectable by Information Type. The Information categories are:
- History - Last Visits
- Shows item history by visit date
- History - Weekly
- Shows item history by week number
- History - Monthly
- Shows item history summarized by month
- Pricing
- Shows current item pricing breakdown
- Inventory
- Shows current item inventory
- Host Inventory
- Shows current host inventory
- Item Information
- Shows item data detail
- Promotions
- Show current item promotion detail
- History - Last Visits

- When an item is selected, associated data for the selected Information Types is shown
In the example below current inventory and pricing are displayed for item K10 Brazil Minas it is selected as an invoice item

A1.3 Proof of Delivery
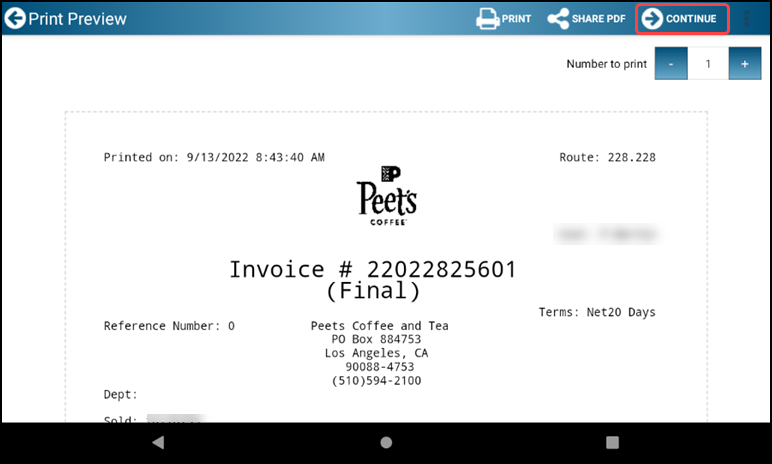
- After printing copies of the invoice. Tap the Continue button to proceed to the Proof of Delivery screen.
- Tap the Take Picture button to open the viewfinder
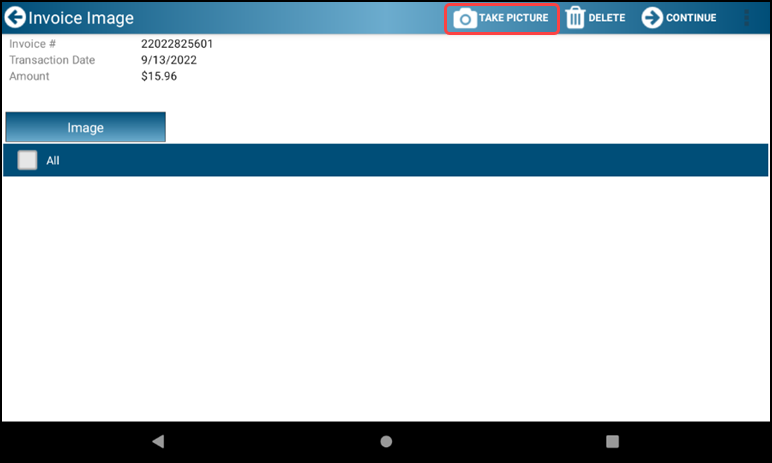
- Take a clear picture of the Invoice

- When an item is selected, associated data for the selected Information Types is shown
In the example below current inventory and pricing are displayed for item K10 Brazil Minas it is selected as an invoice item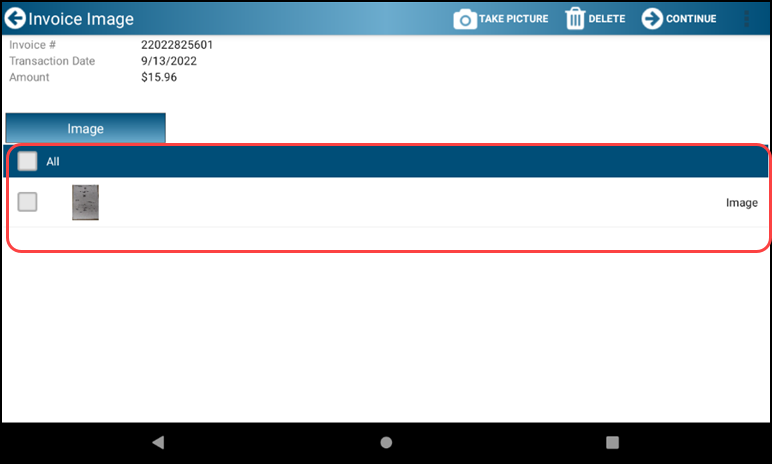
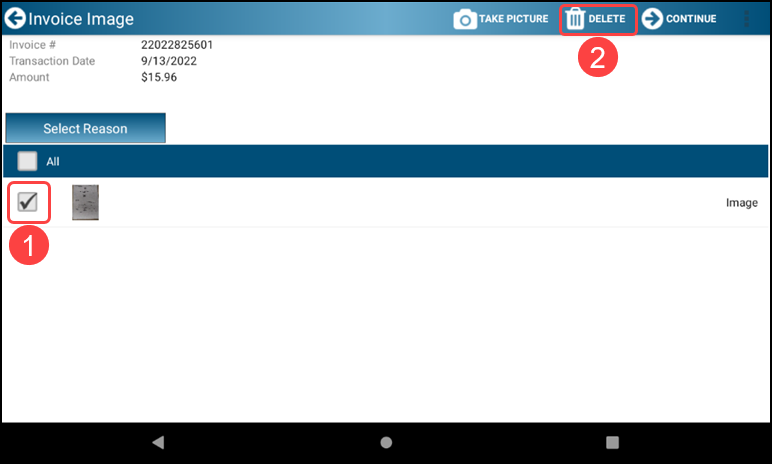
- To delete an image to retake, select the image and tap the DELETE option
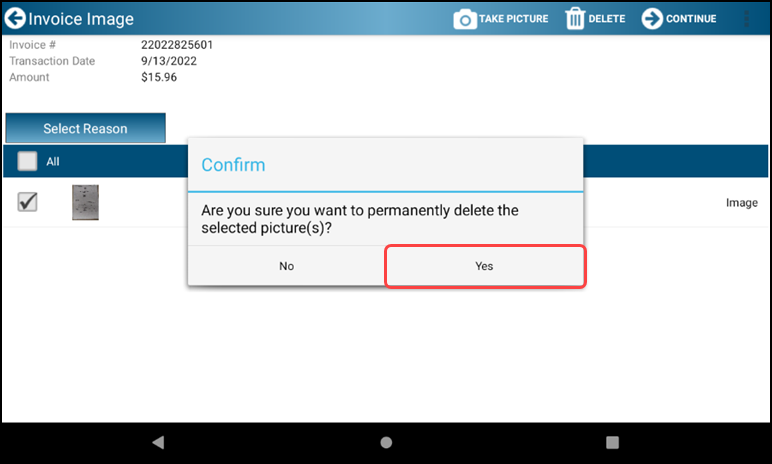
- Then tap the Yes button to confirm the deletion of the image
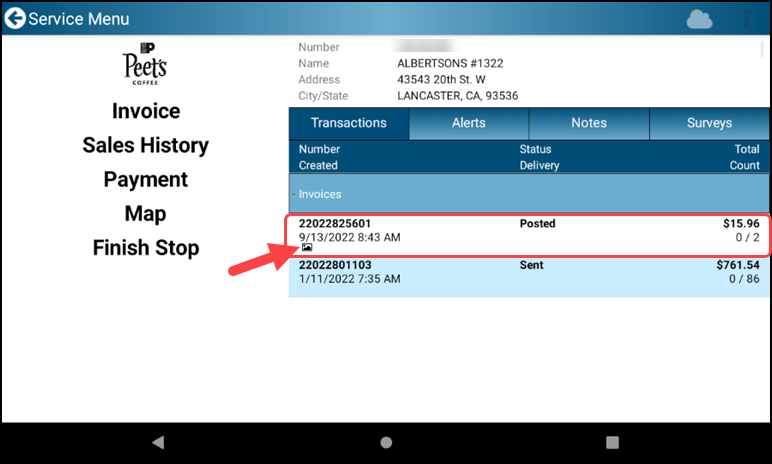
- To finalize and post the invoice, tap the CONTINUE button

- In the Service Account screen, an image icon appears indicating Proof of Delivery image was captured
Comments
0 comments
Please sign in to leave a comment.